Adding the Facebook Chat Plugin to Your Website
Note: This article is about using Facebook's branded chat plugin on your own website. If you want to use the Ralli plugin (which allows for both anonymous and Facebook users), please check out the article here.
The included images on this page are using the older version of Facebook's theme. The location and look of the plugin creation is otherwise in the same location in the new themes, but just looks slightly different getting there.
This step will require you to put code on your website, please make sure you are able to do that before continuing.
Finally, you must have a Facebook page linked with your Ralli account. If you haven't done that yet, please do so here before continuing.
The Facebook chat plugin is a great way to augment your business' website experience with your Facebook page. When users come to your website, they are immediately prompted by the plugin to start a chat using Facebook - a platform many are much more comfortable with.
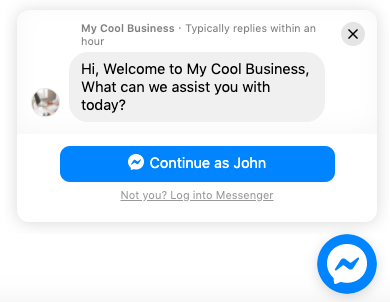
The experience is much more personalised for those customers who come through and are already signed into Facebook, however, those who don't have a Facebook account, or don't want to talk to you through it are more likely to churn.
If your business is heavy "social media", it makes sense to use it to stay on-brand and so this is a great fit, but if your audience isn't in that demographic, you're probably better off using the Ralli plugin above instead (as Ralli will still let them use their Facebook account if they want).
If you're using a hosted solution, such as WordPress, Shopify, or Wix, check out the end of this article for steps on how to install this to your website.
Creating Your Facebook Chat Plugin
The process for adding the plugin to your page is super easy (so long as you've already setup Ralli with your Facebook page...).
Get started by opening Facebook pages:
Facebook Pages
Opens in a new tab
Select the Facebook Page You Want to Work With
Open the Facebook page you have linked with Ralli. Whilst you can (obviously) generate code for other pages, if you haven't linked them with Ralli, messages will not flow to Ralli's apps/website.
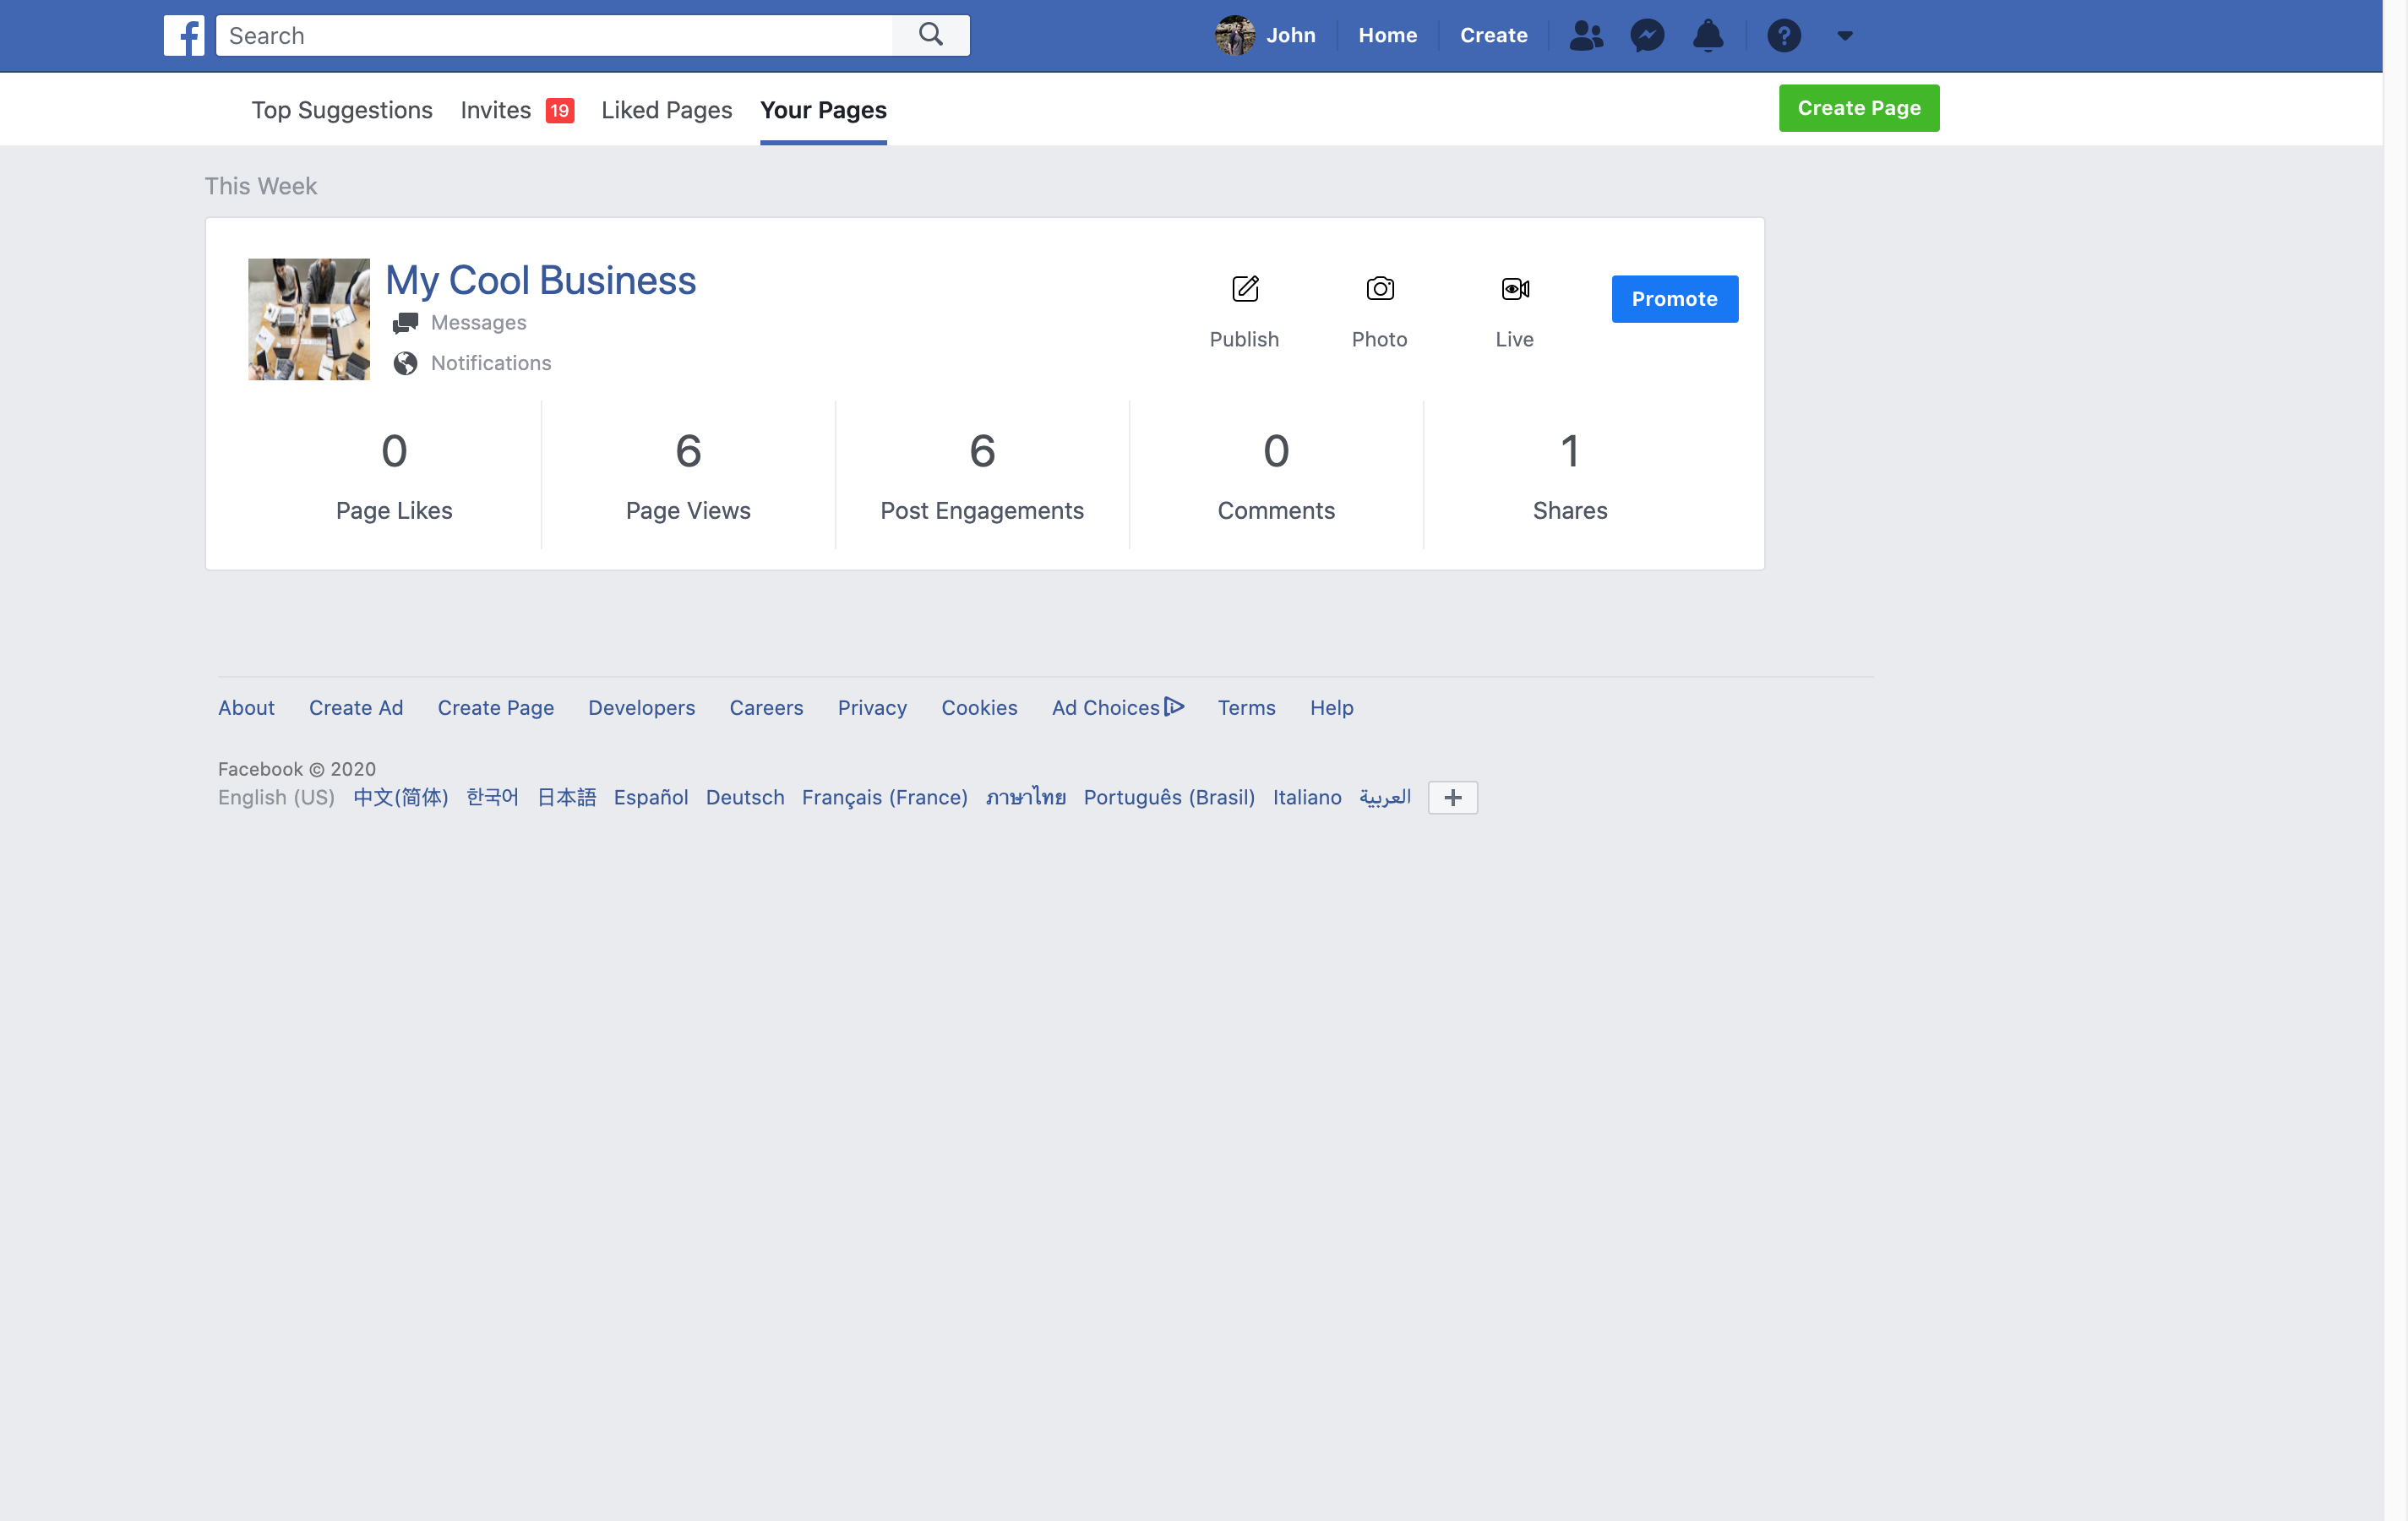
And navigate over to the Messaging Panel within your page's Settings
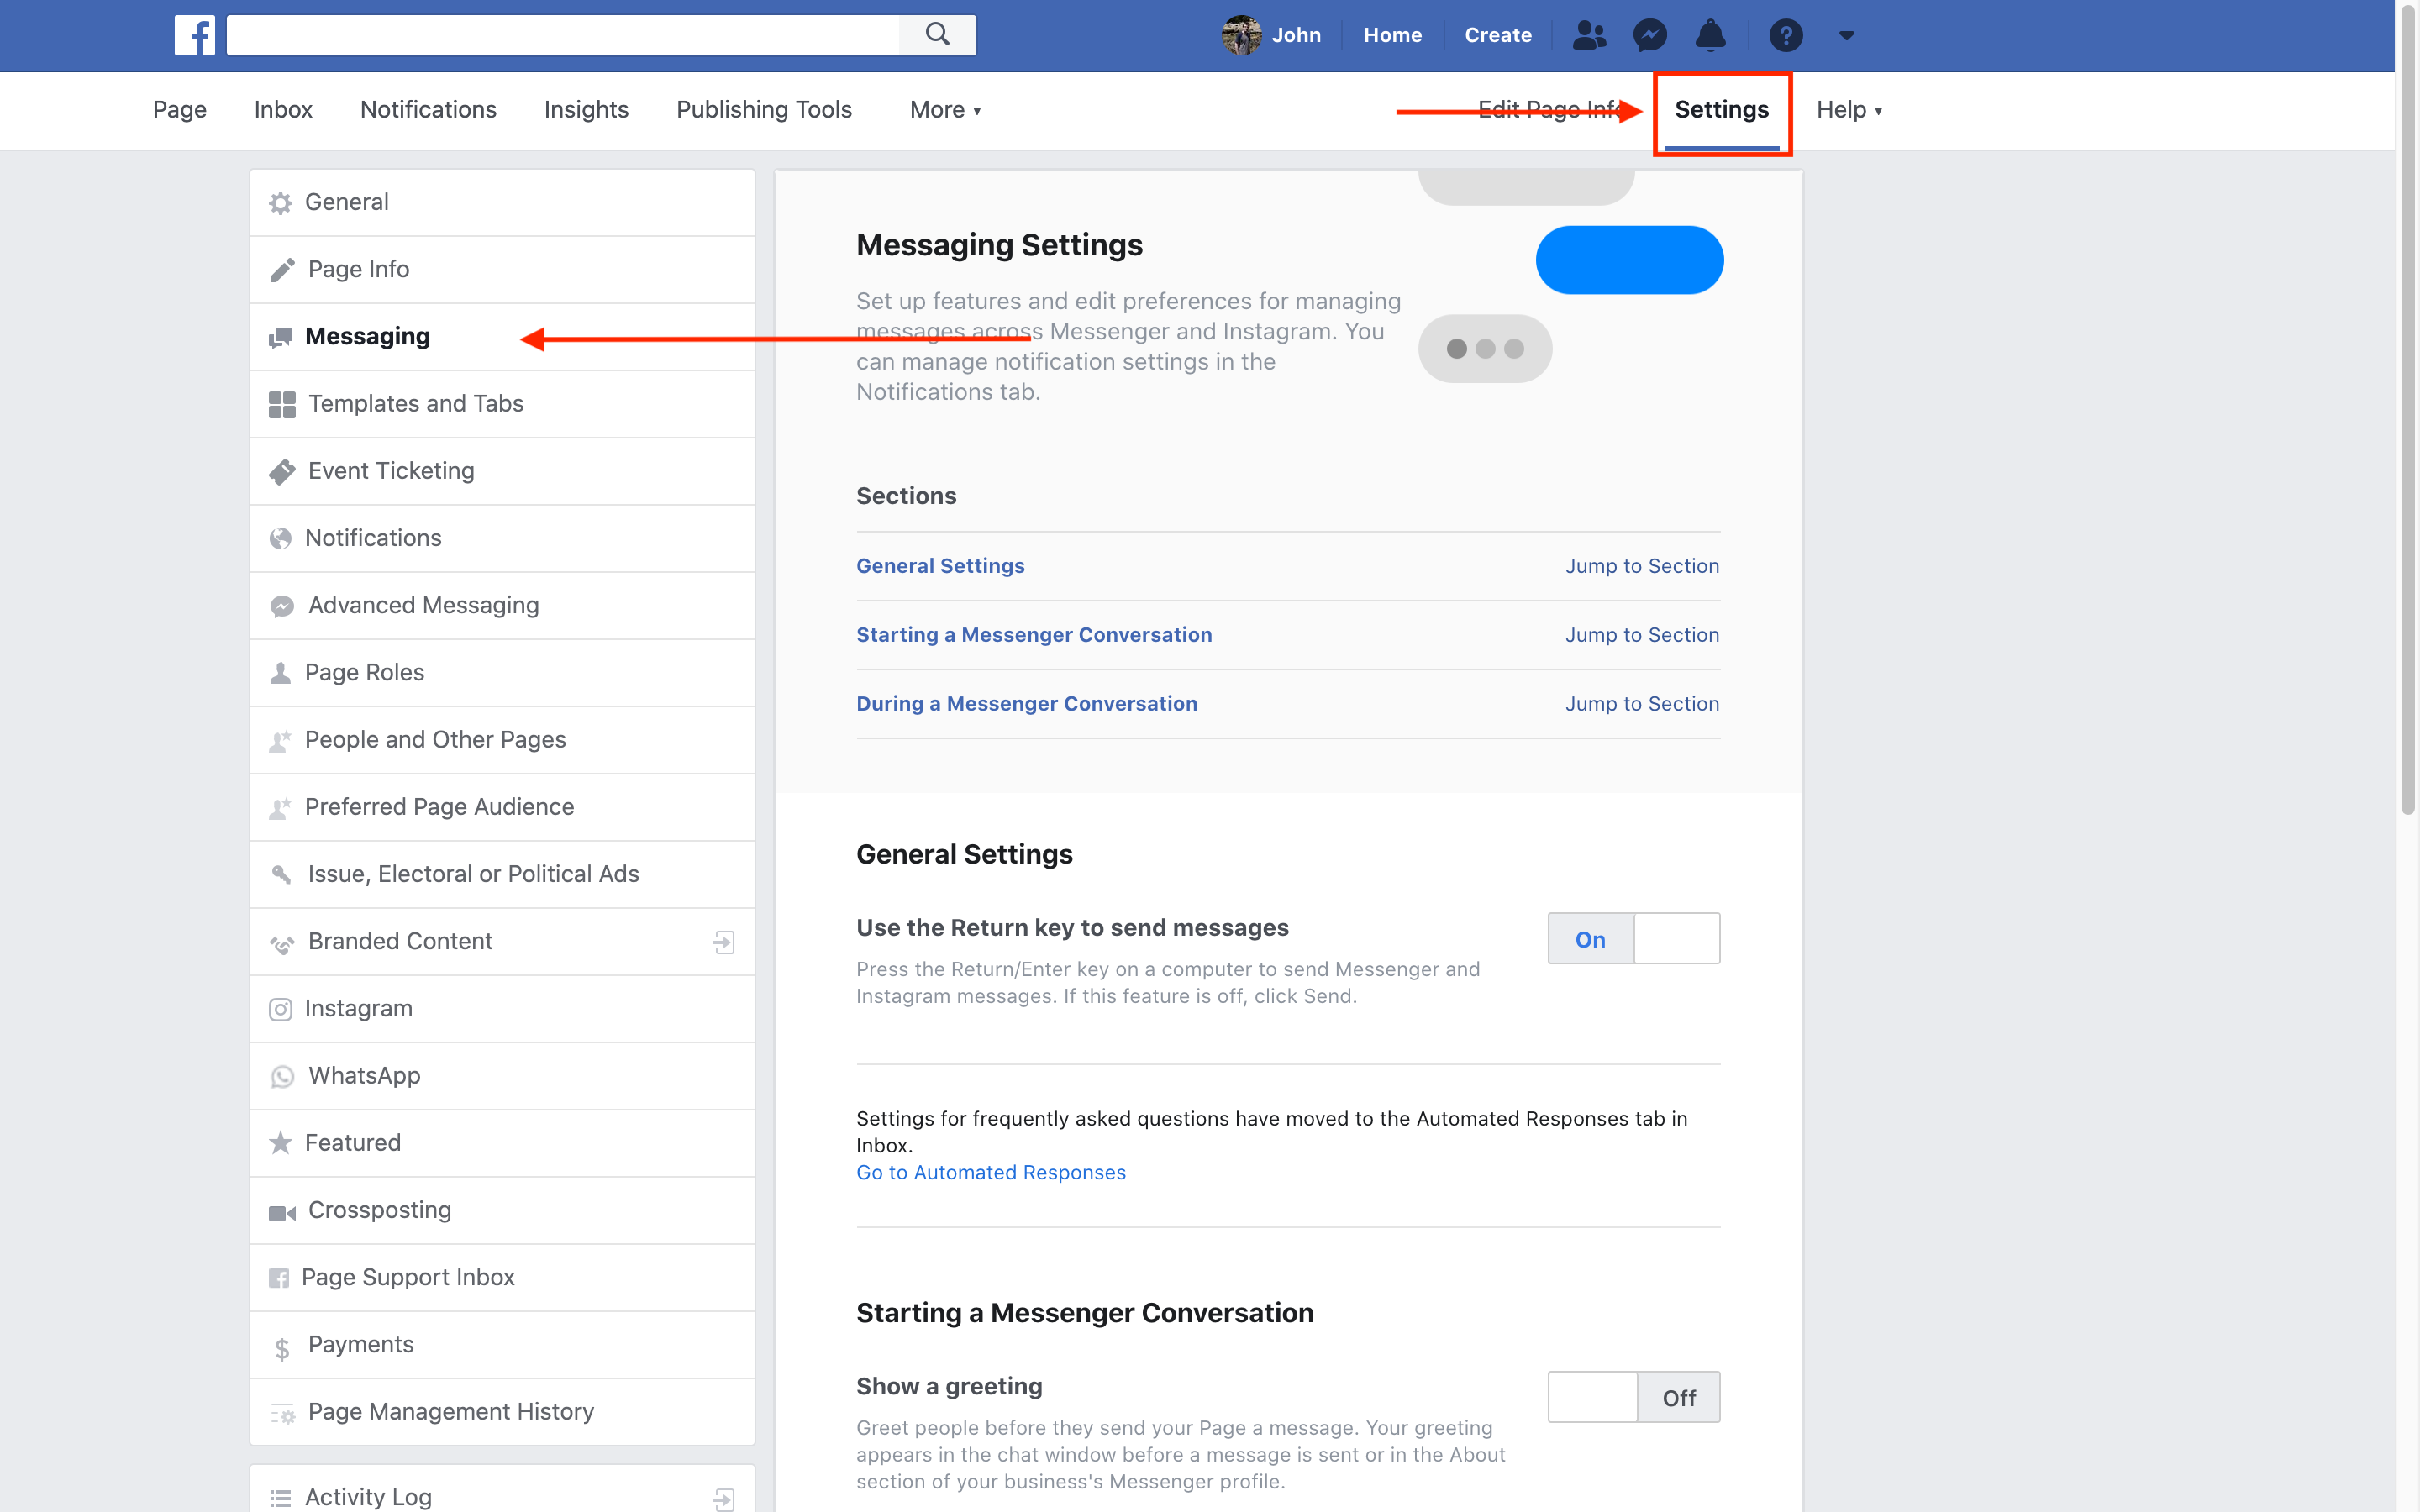
You may be interested in some of the other functionality that Facebook provides here, in particular, Automated Responses for FAQ's/after-hours support messages are popular extensions.
Otherwise, navigate down to the cell titled Add Messenger to your website and click the Get Started button.
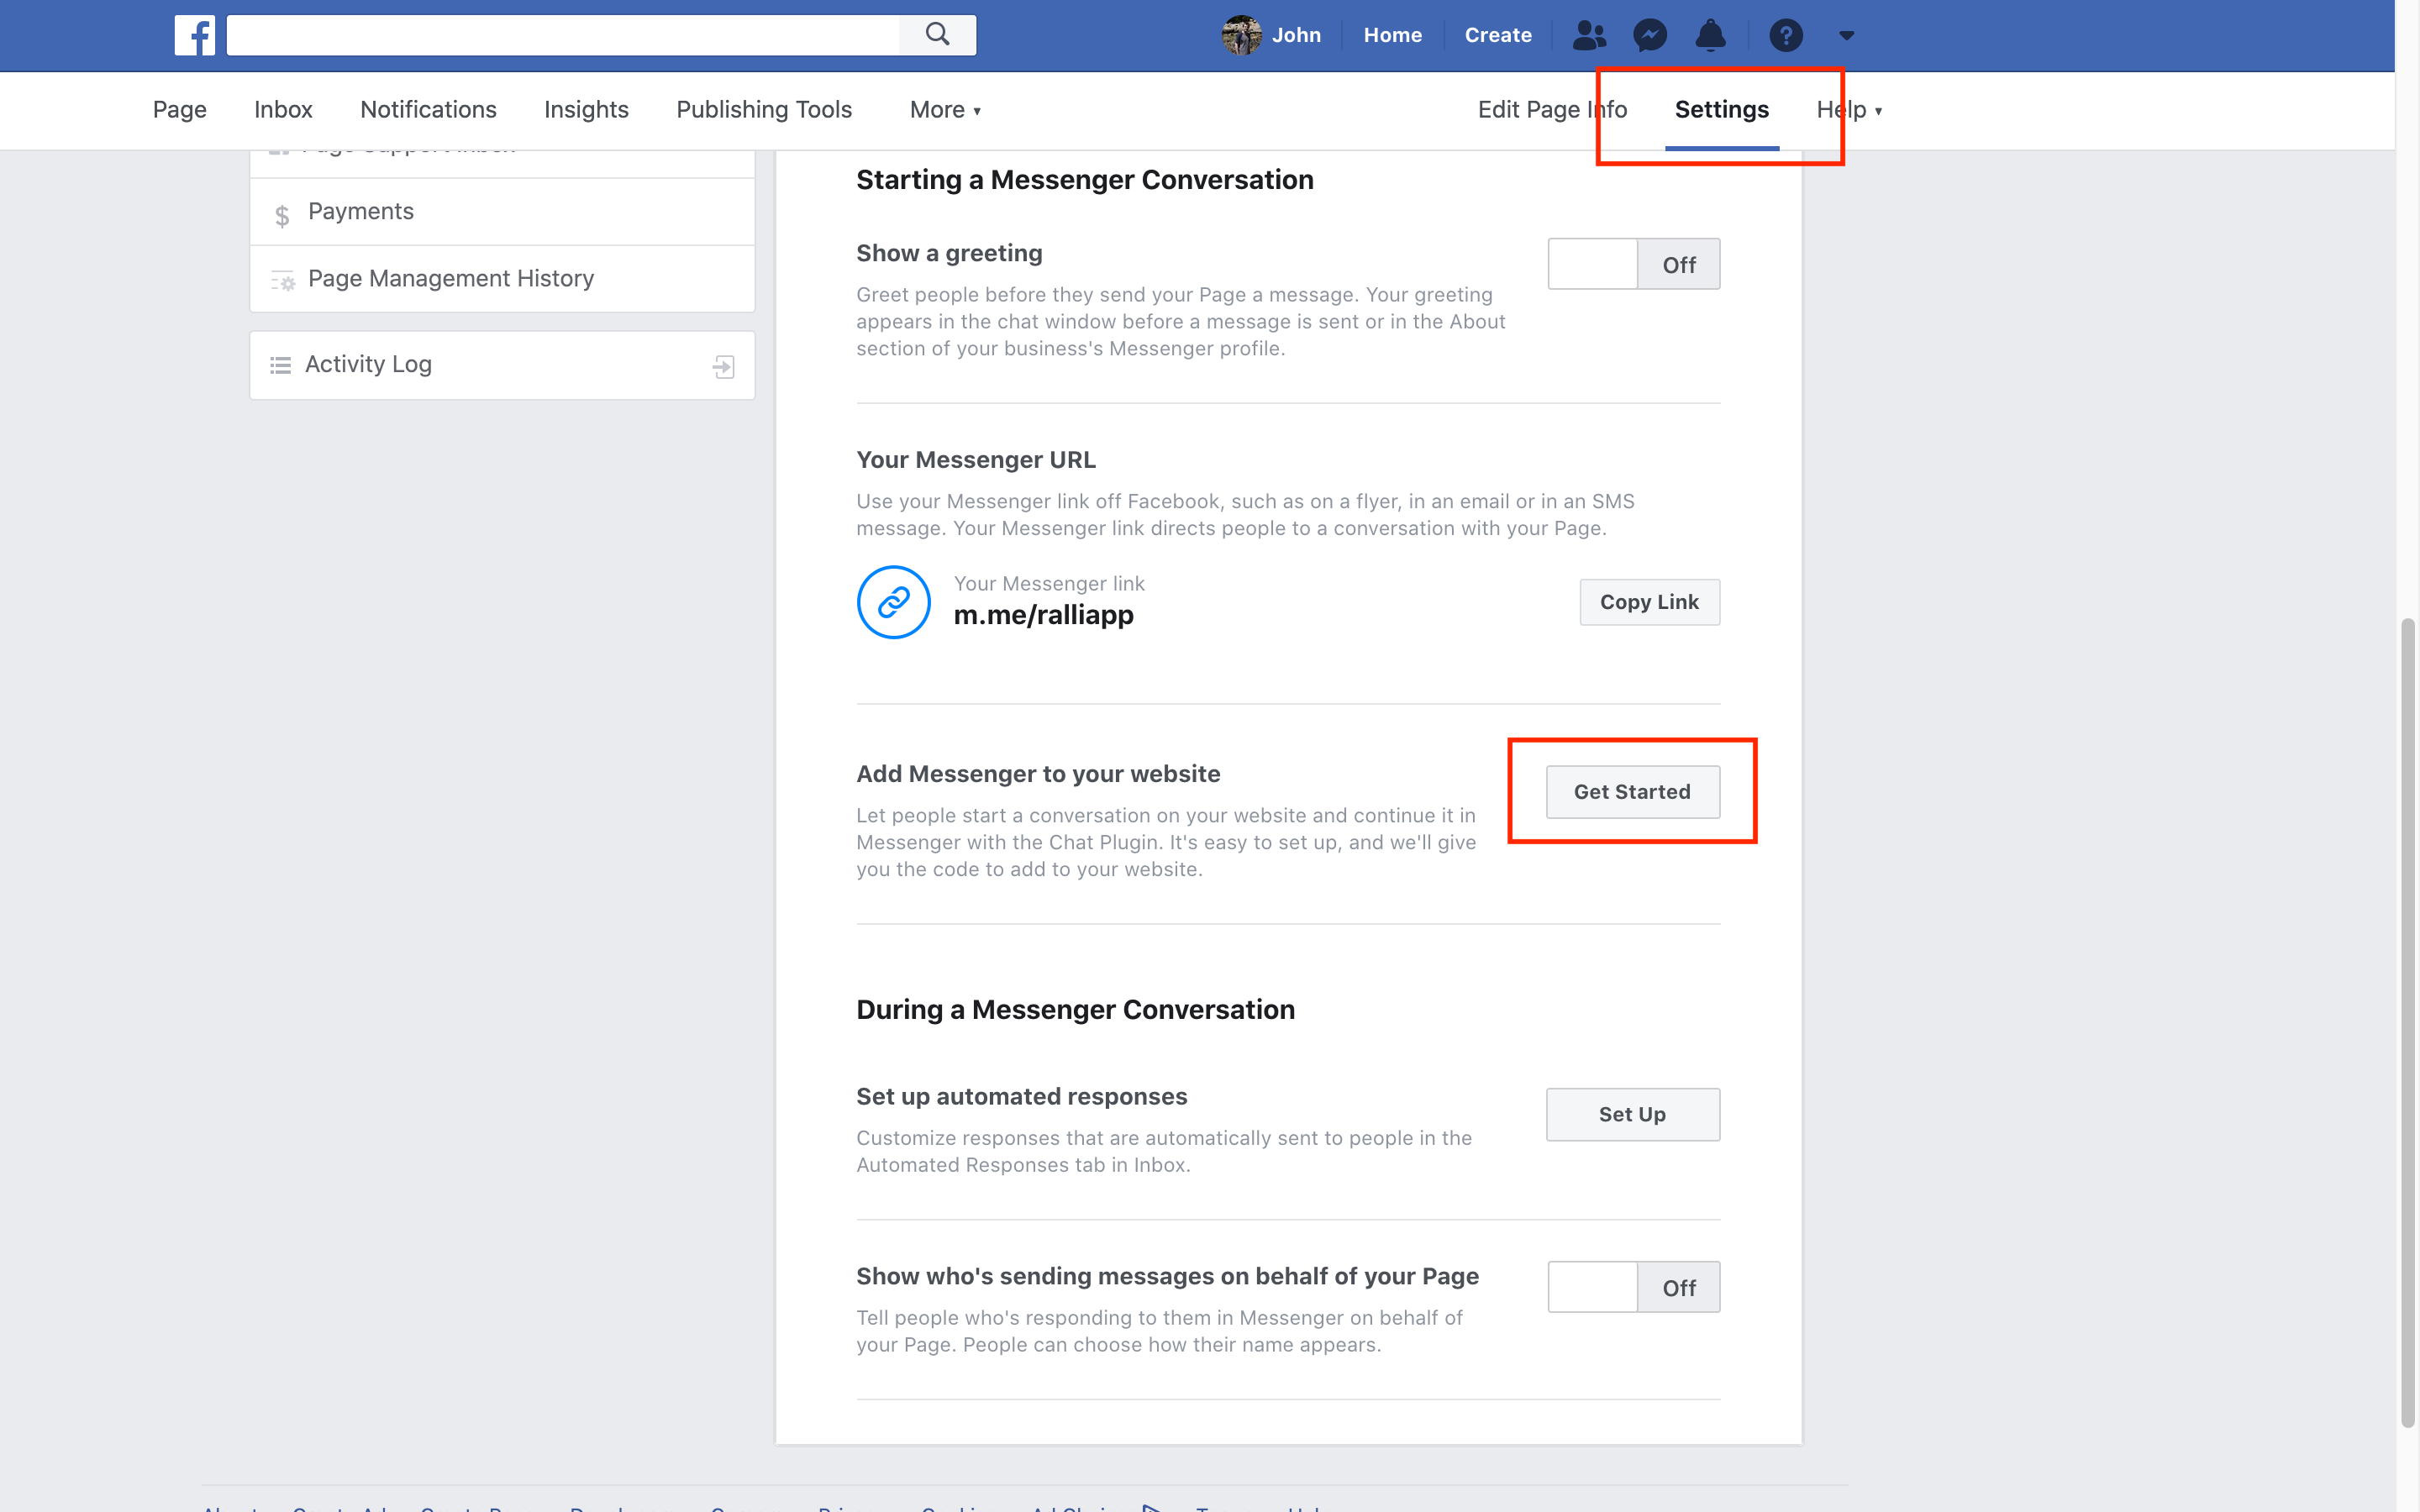
Filling in Your Details
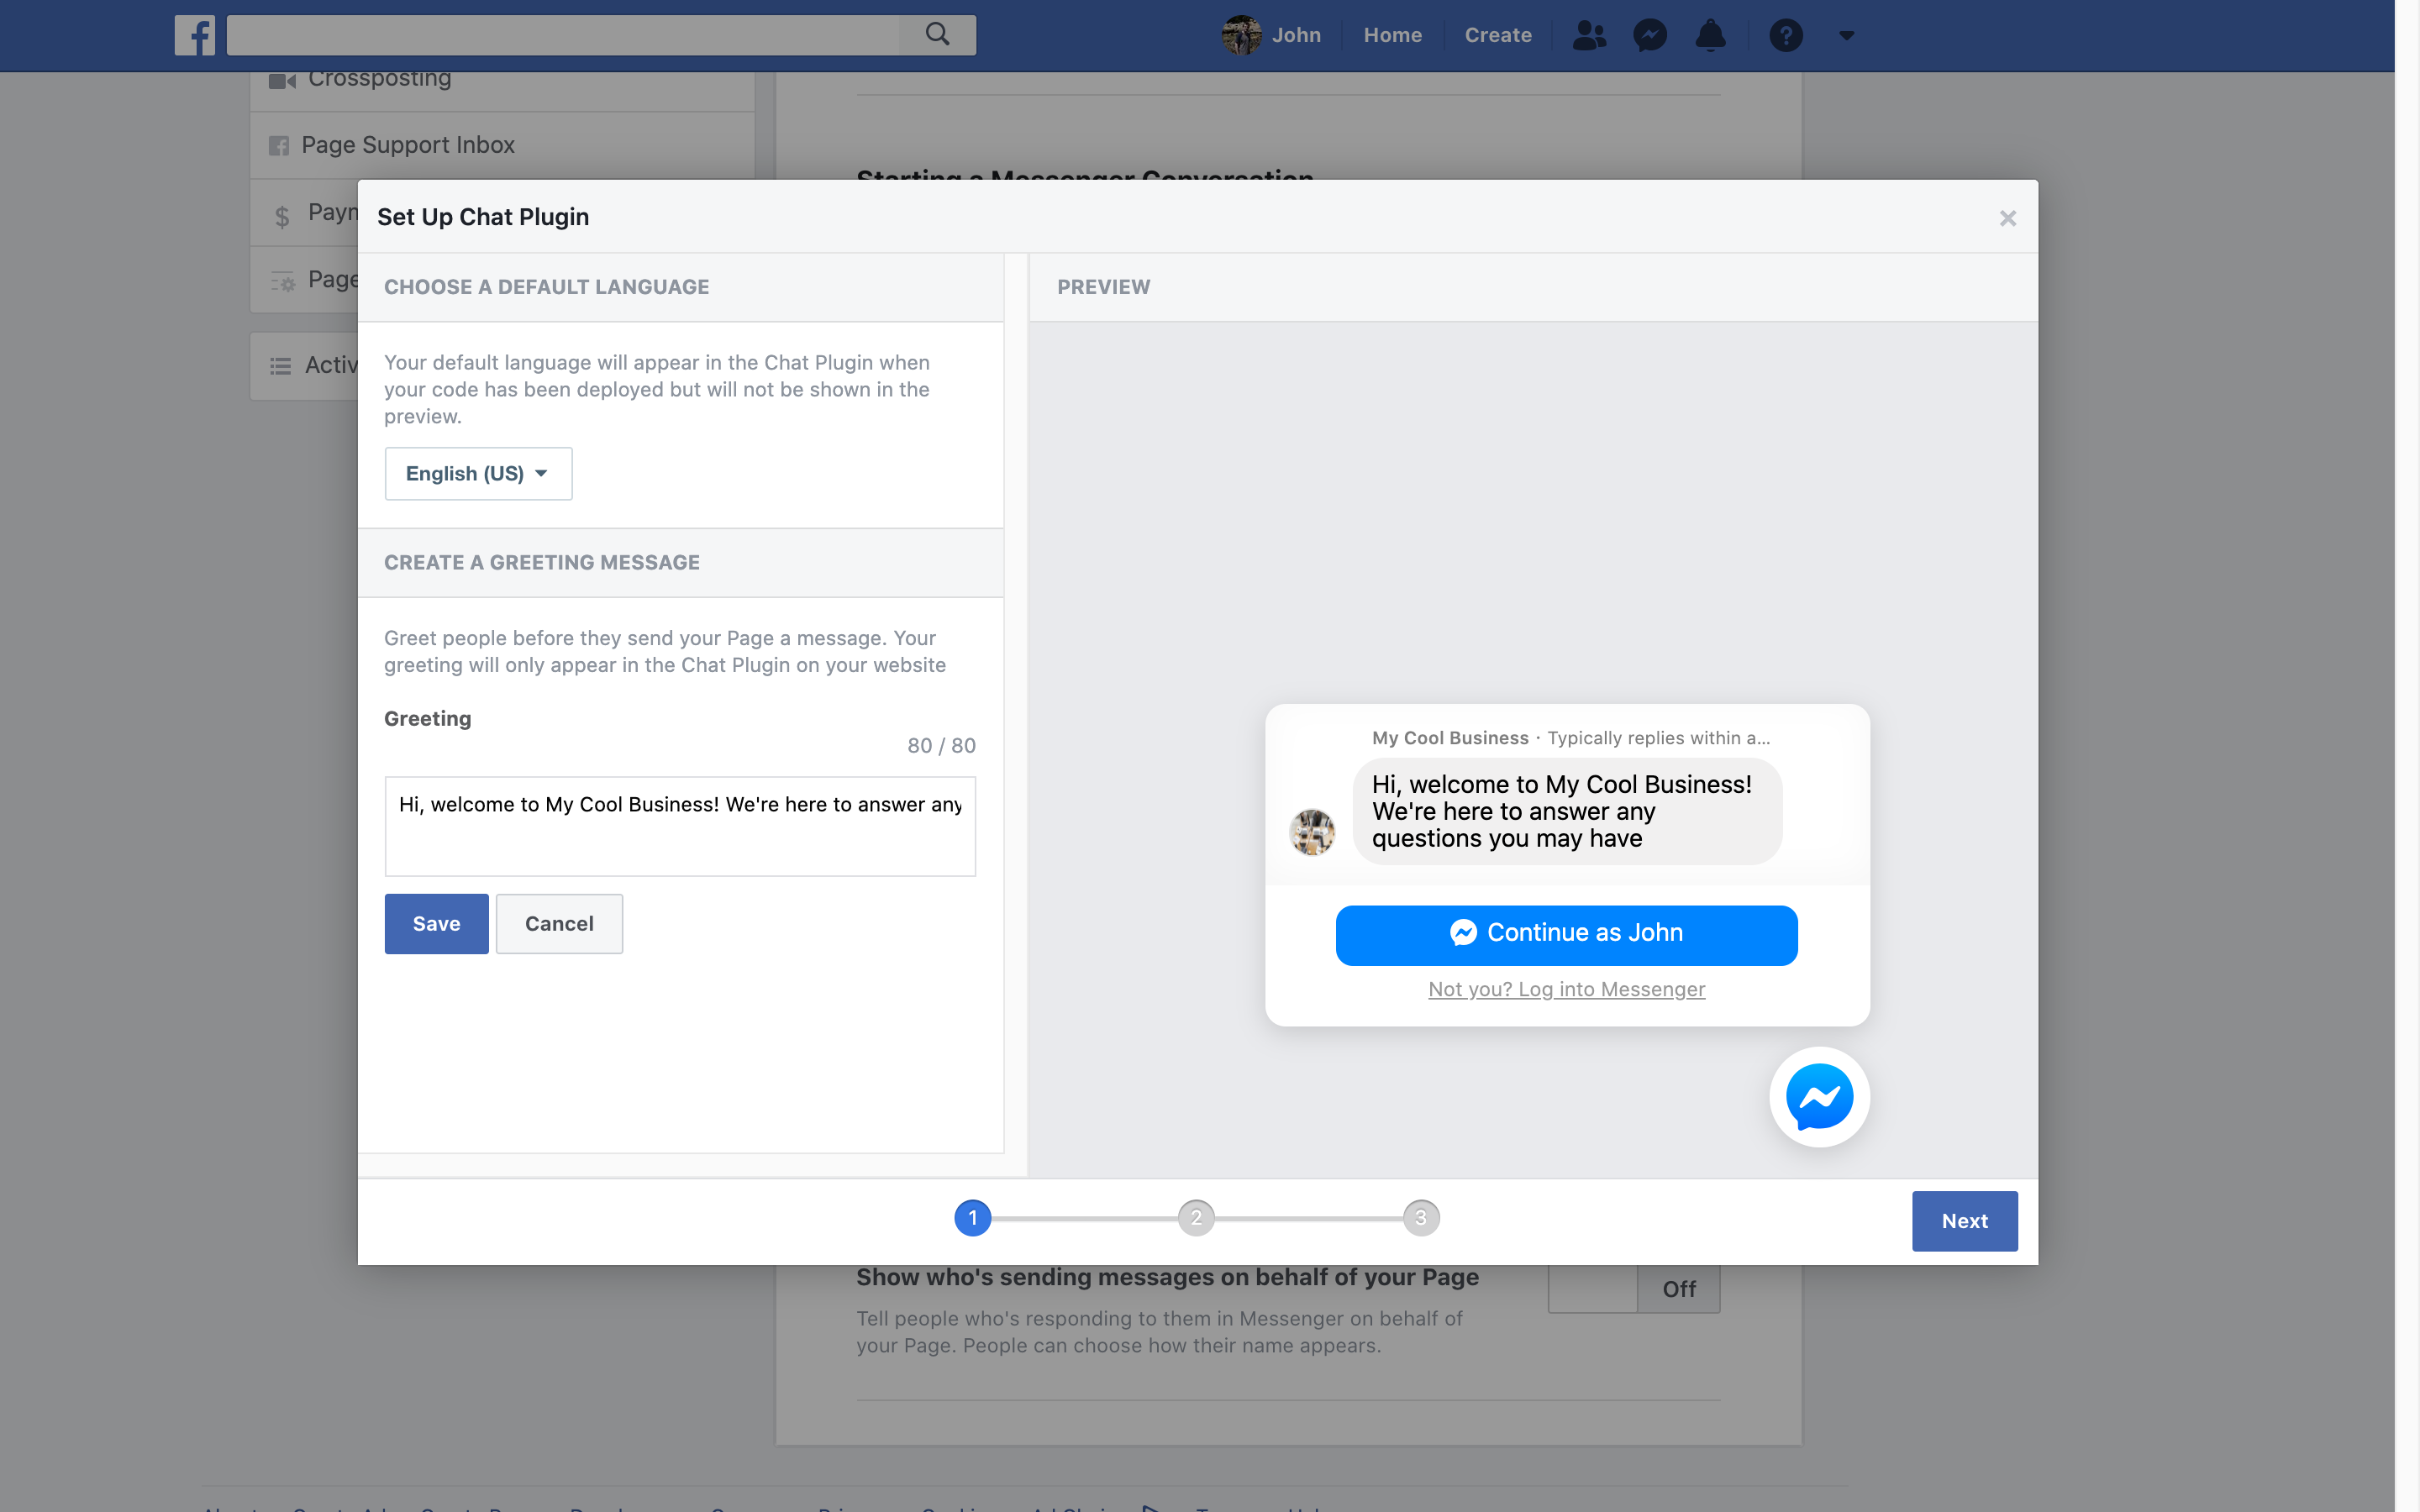
Filling in your details will generate a piece of code for you (or your web developer) to add to your website.
Greeting
Make a greeting that "pops" for your business' brand. This is an important step as it's the message that your customers see first - and helps them know that they can chat with you.
The more personal and relevant to your brand it is, the more likely customers will engage with it. Your message must be no longer than 80 characters.
Colour Picker (optional)
Make the chat plugin look right for your brand. Select the colour palette that best suits your brand. When the Facebook plugin loads on your page, it'll display your brand's colours instead of Facebook Messenger's default light blue. If you like that style (and your customer's will likely identify it much quicker), then just leave it as is.
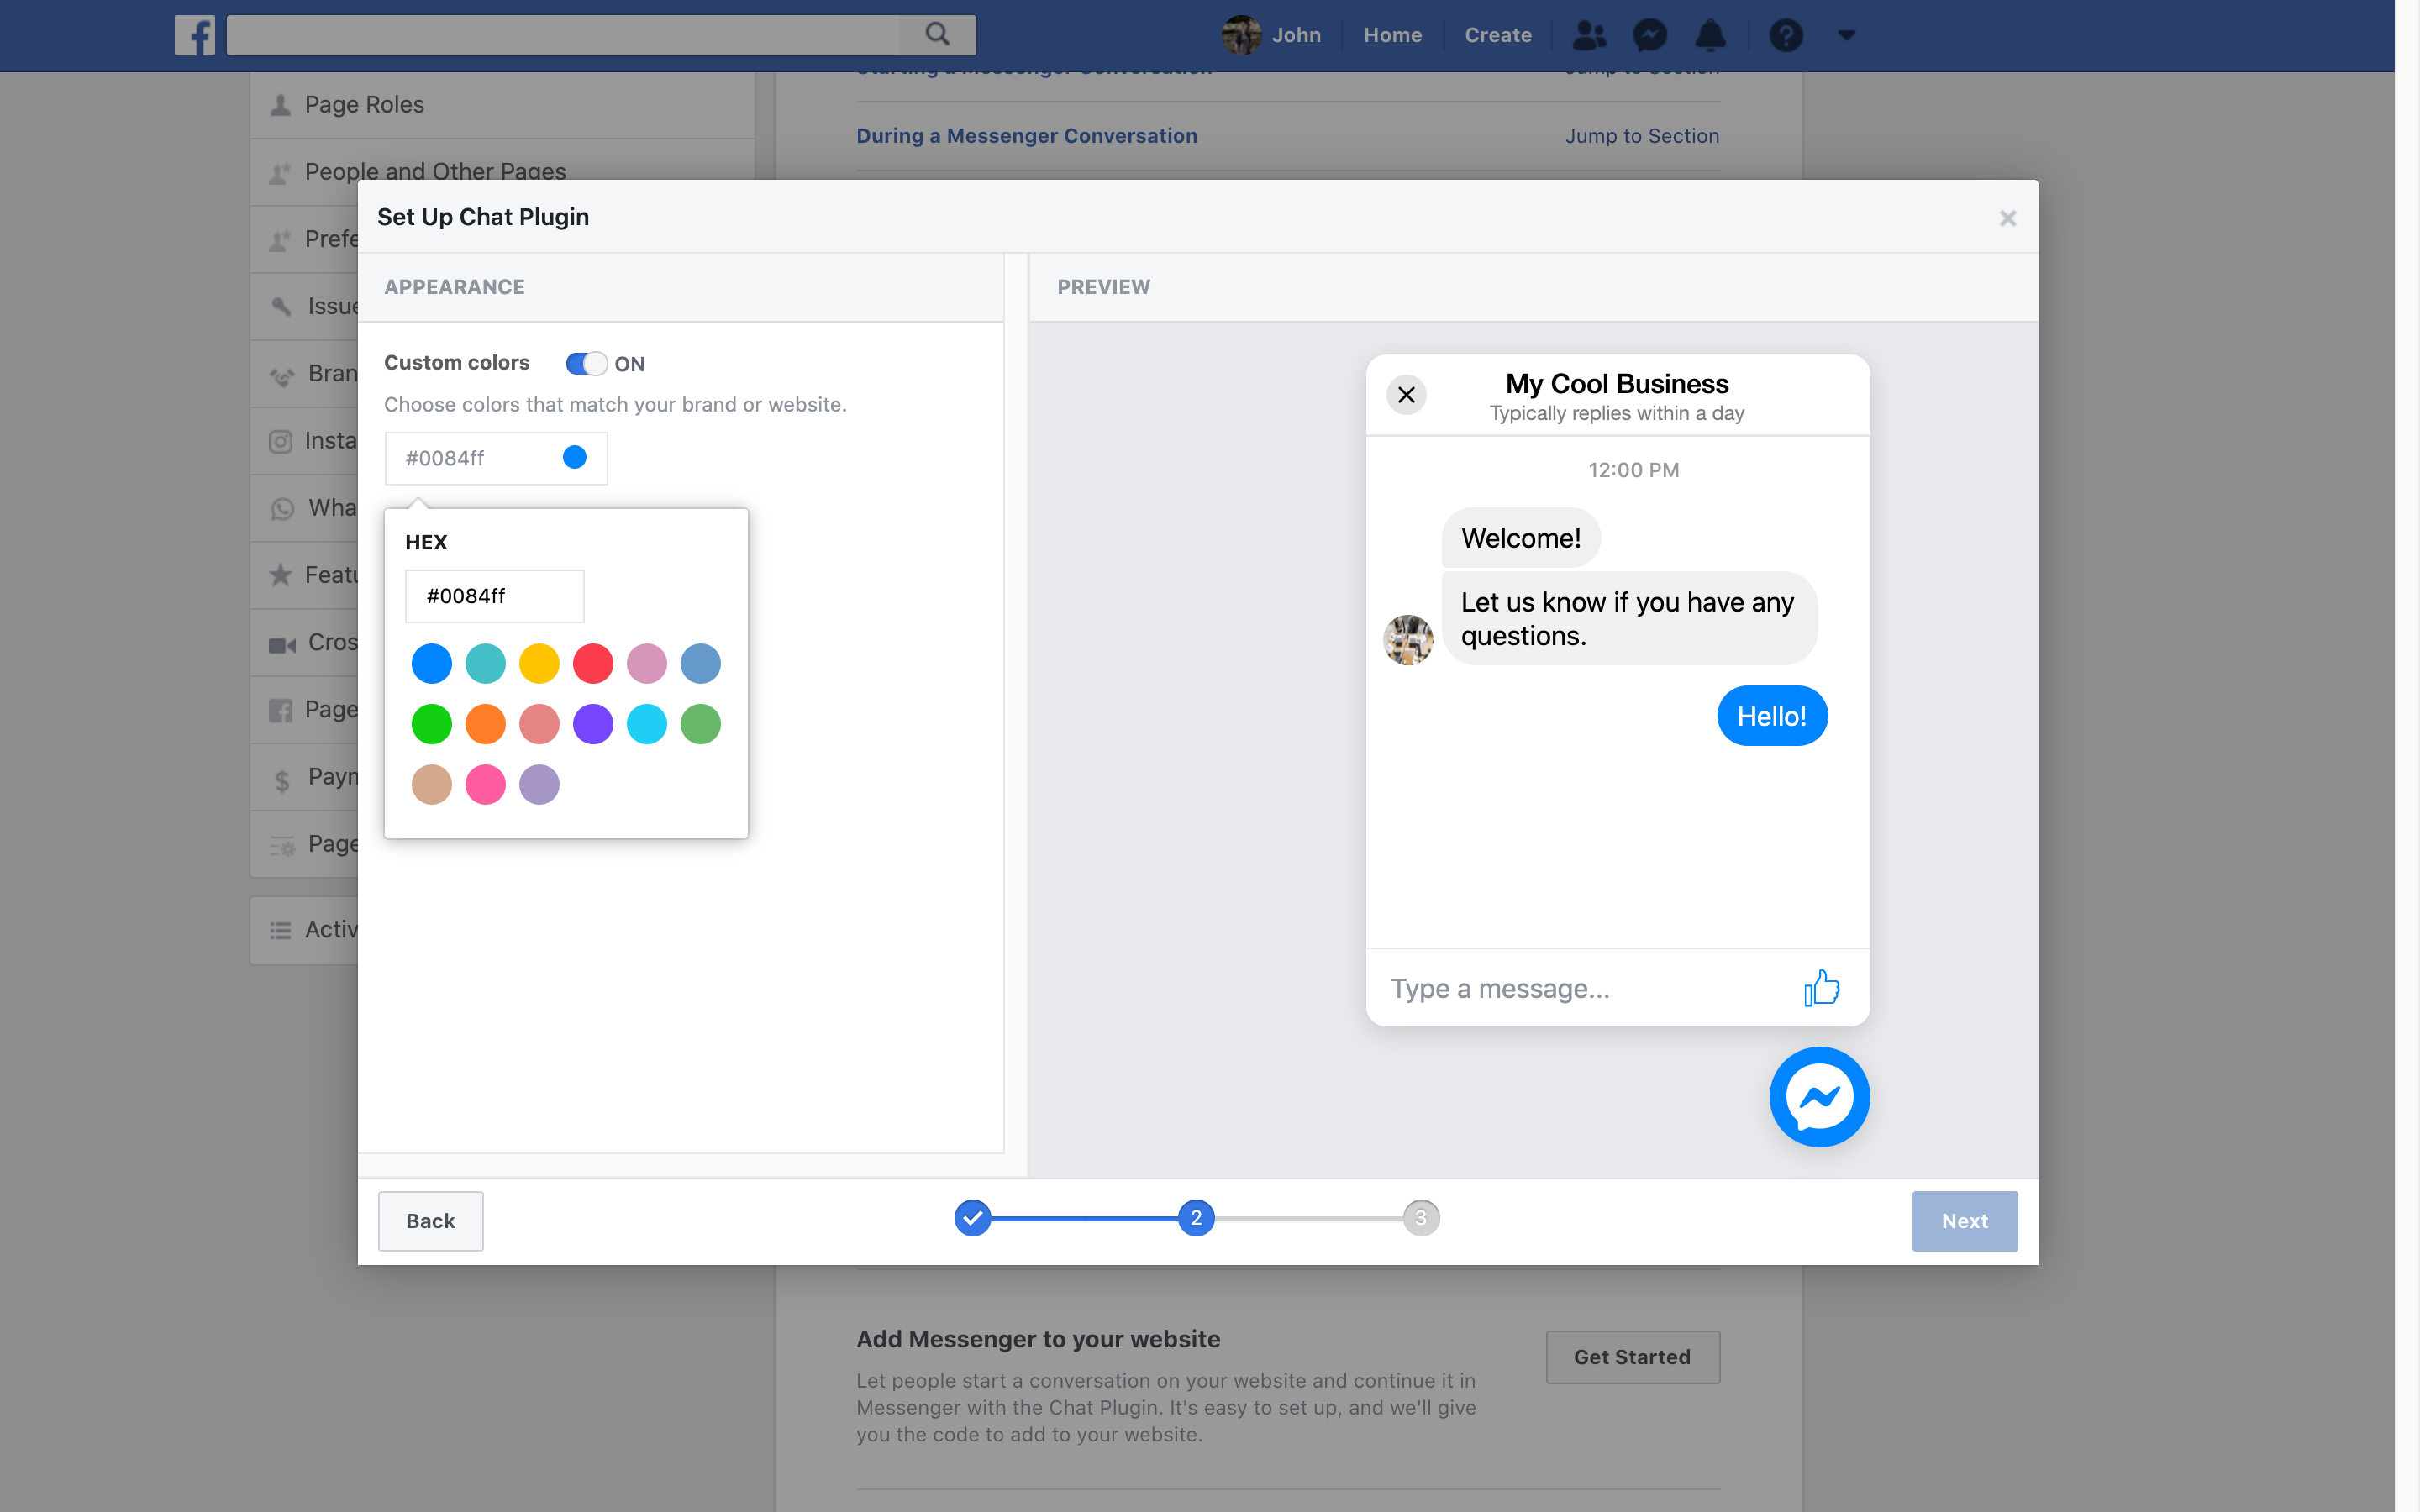
Please make sure you pick colours that provide enough contrast so that text remains readable on your site - otherwise customers will have a poor user experience and may not engage as eagerly.
Website Domains (important)
This part is particularly important to get right, and is a little fiddly. In this final step, you will need to insert your business' website address and Ralli's.
Please note that you website must be a secure HTTPS address - Facebook will not allow regular HTTP values.
In the box titled Add Website Domain Name add the following values:
- Your domain(s) - in this worked example, this would be
https://mycoolbusiness.com, but you need to use the website address of your business (and any other websites you want to put this plugin on). https://webview.ralli.app/- this is the magic glue that will allow Ralli to work properly
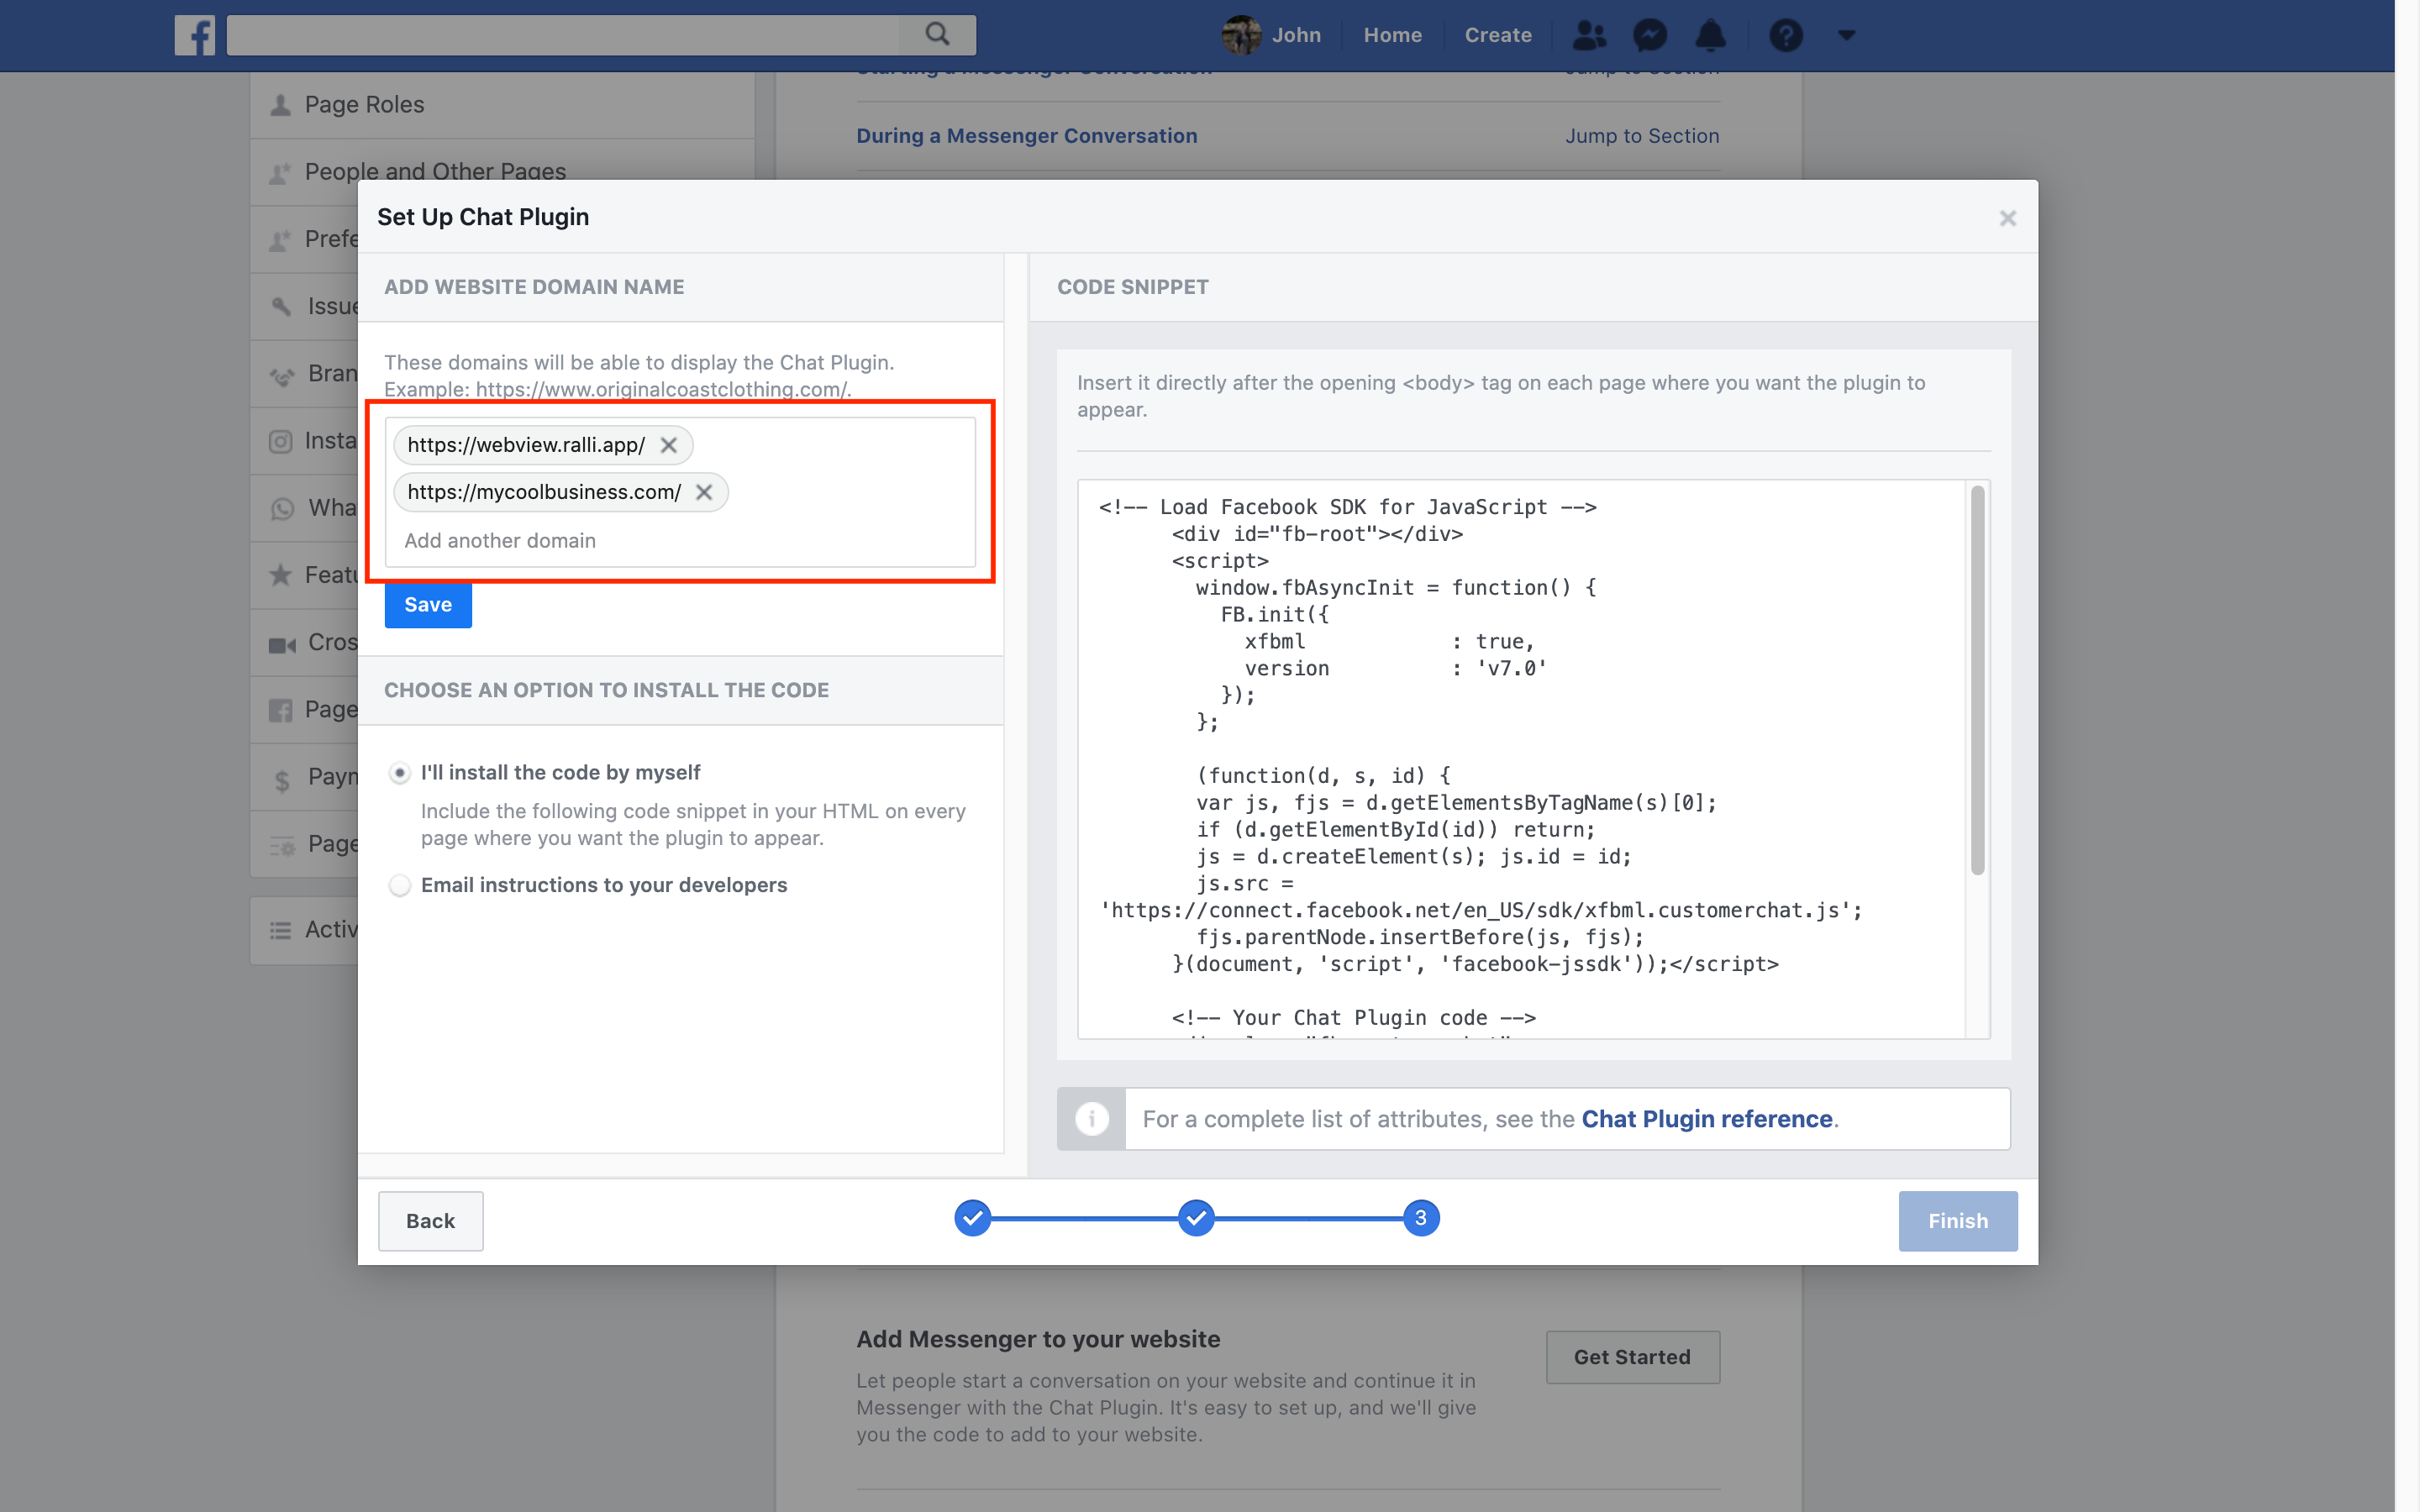
You don't need to define every page in your website, just the top level URL. If you need some help with this part, please do reach out and we'd be hapy to guide you through the process.
Installation
Great! Once, you're happy with how all of that looks, copy the entire code snippet generated by Facebook and insert it into the <body> tag of your website. And if that sounds like moonspeak, use the tool to email it to your developer (or send them the code snippet) to get them to do it for you.
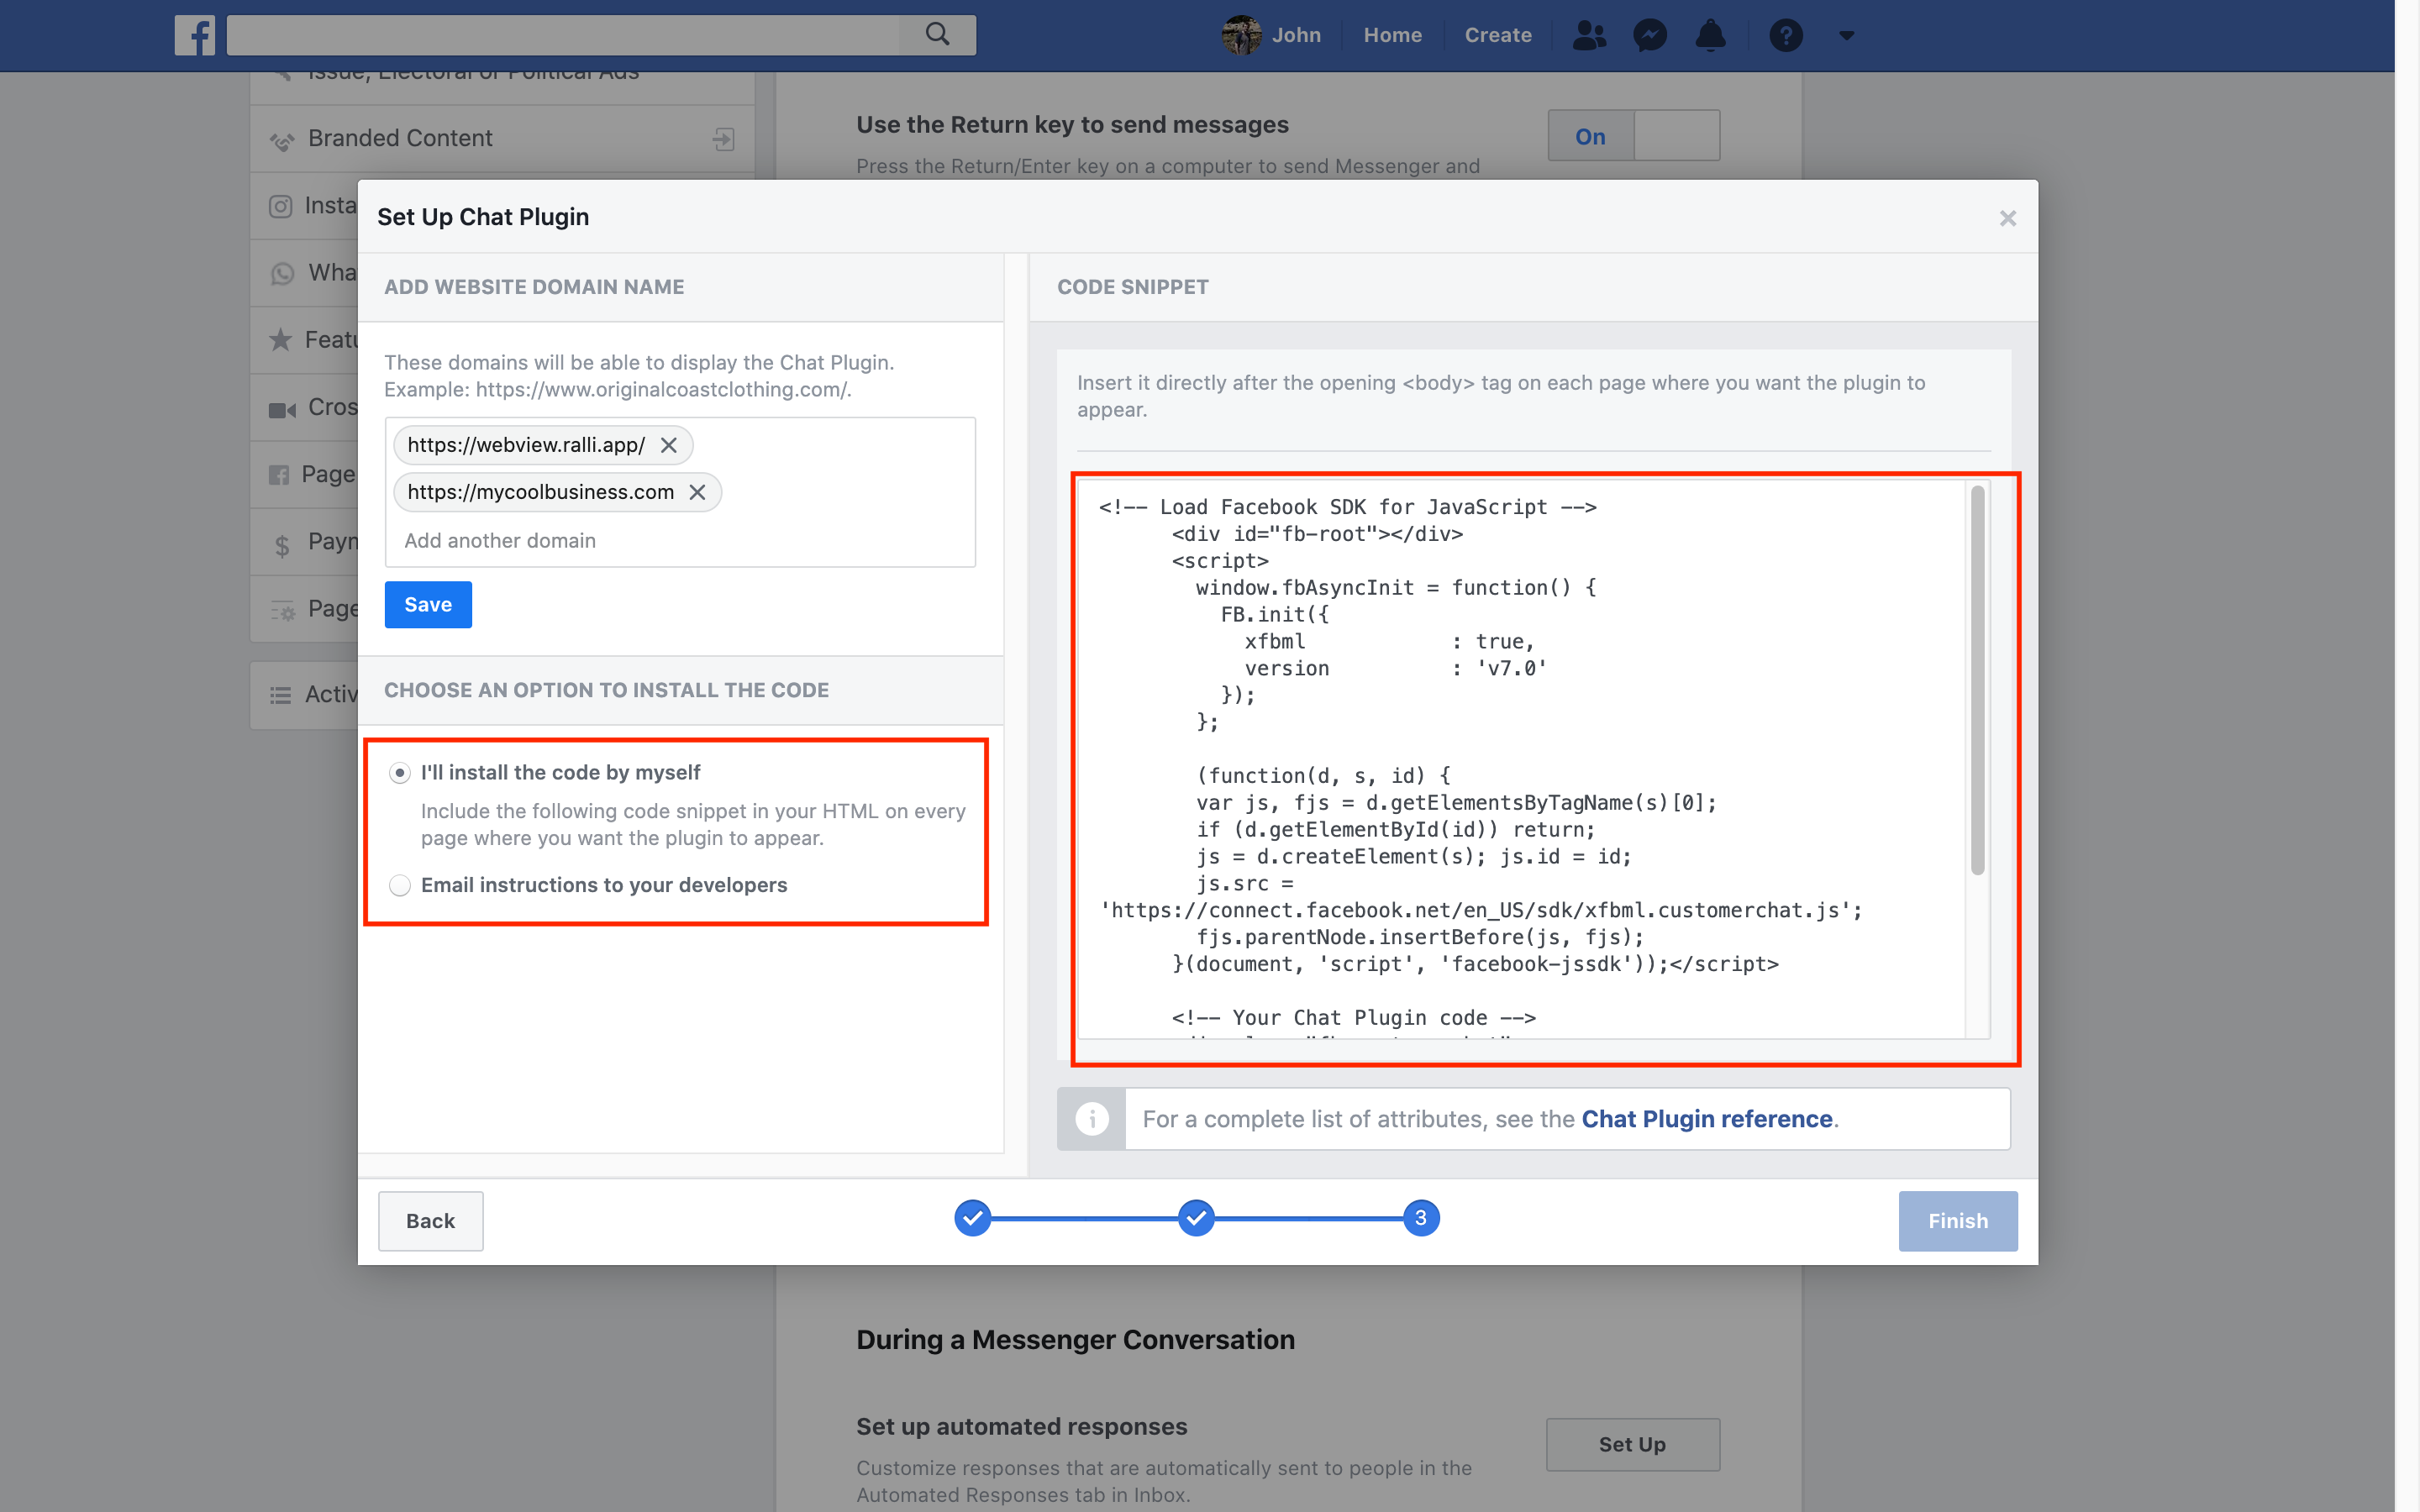
Please note: You need to click Finish to apply these settings. Do this after you have copied/emailed the code snippet as you'll need to click through the dialog again to get to it otherwise!
That's it (phew )! If you've followed all of these steps, and the plugin doesn't work for you, please reach out to us and we'd be more than happy to have a look and help get it going for you.
Hosted Solutions
Here are a few ways you can easily embed the generated plugin with a hosted solutions provider. If you don't see yours listed, please let us know and we can step you through the process for your provider.
WordPress Plugin
You can skip this whole tutorial, there is an official plugin to save you the hassle ()! Install it straight to your WordPress site:
The Official Facebook Chat Plugin for WordPress
Opens in a new tab
Shopify
If you're using Shopify as your website's hosting provider, you can embed the code the code into your shop's theme yourself. To do this, open your shop's theme editor from your Shopify dashboard.
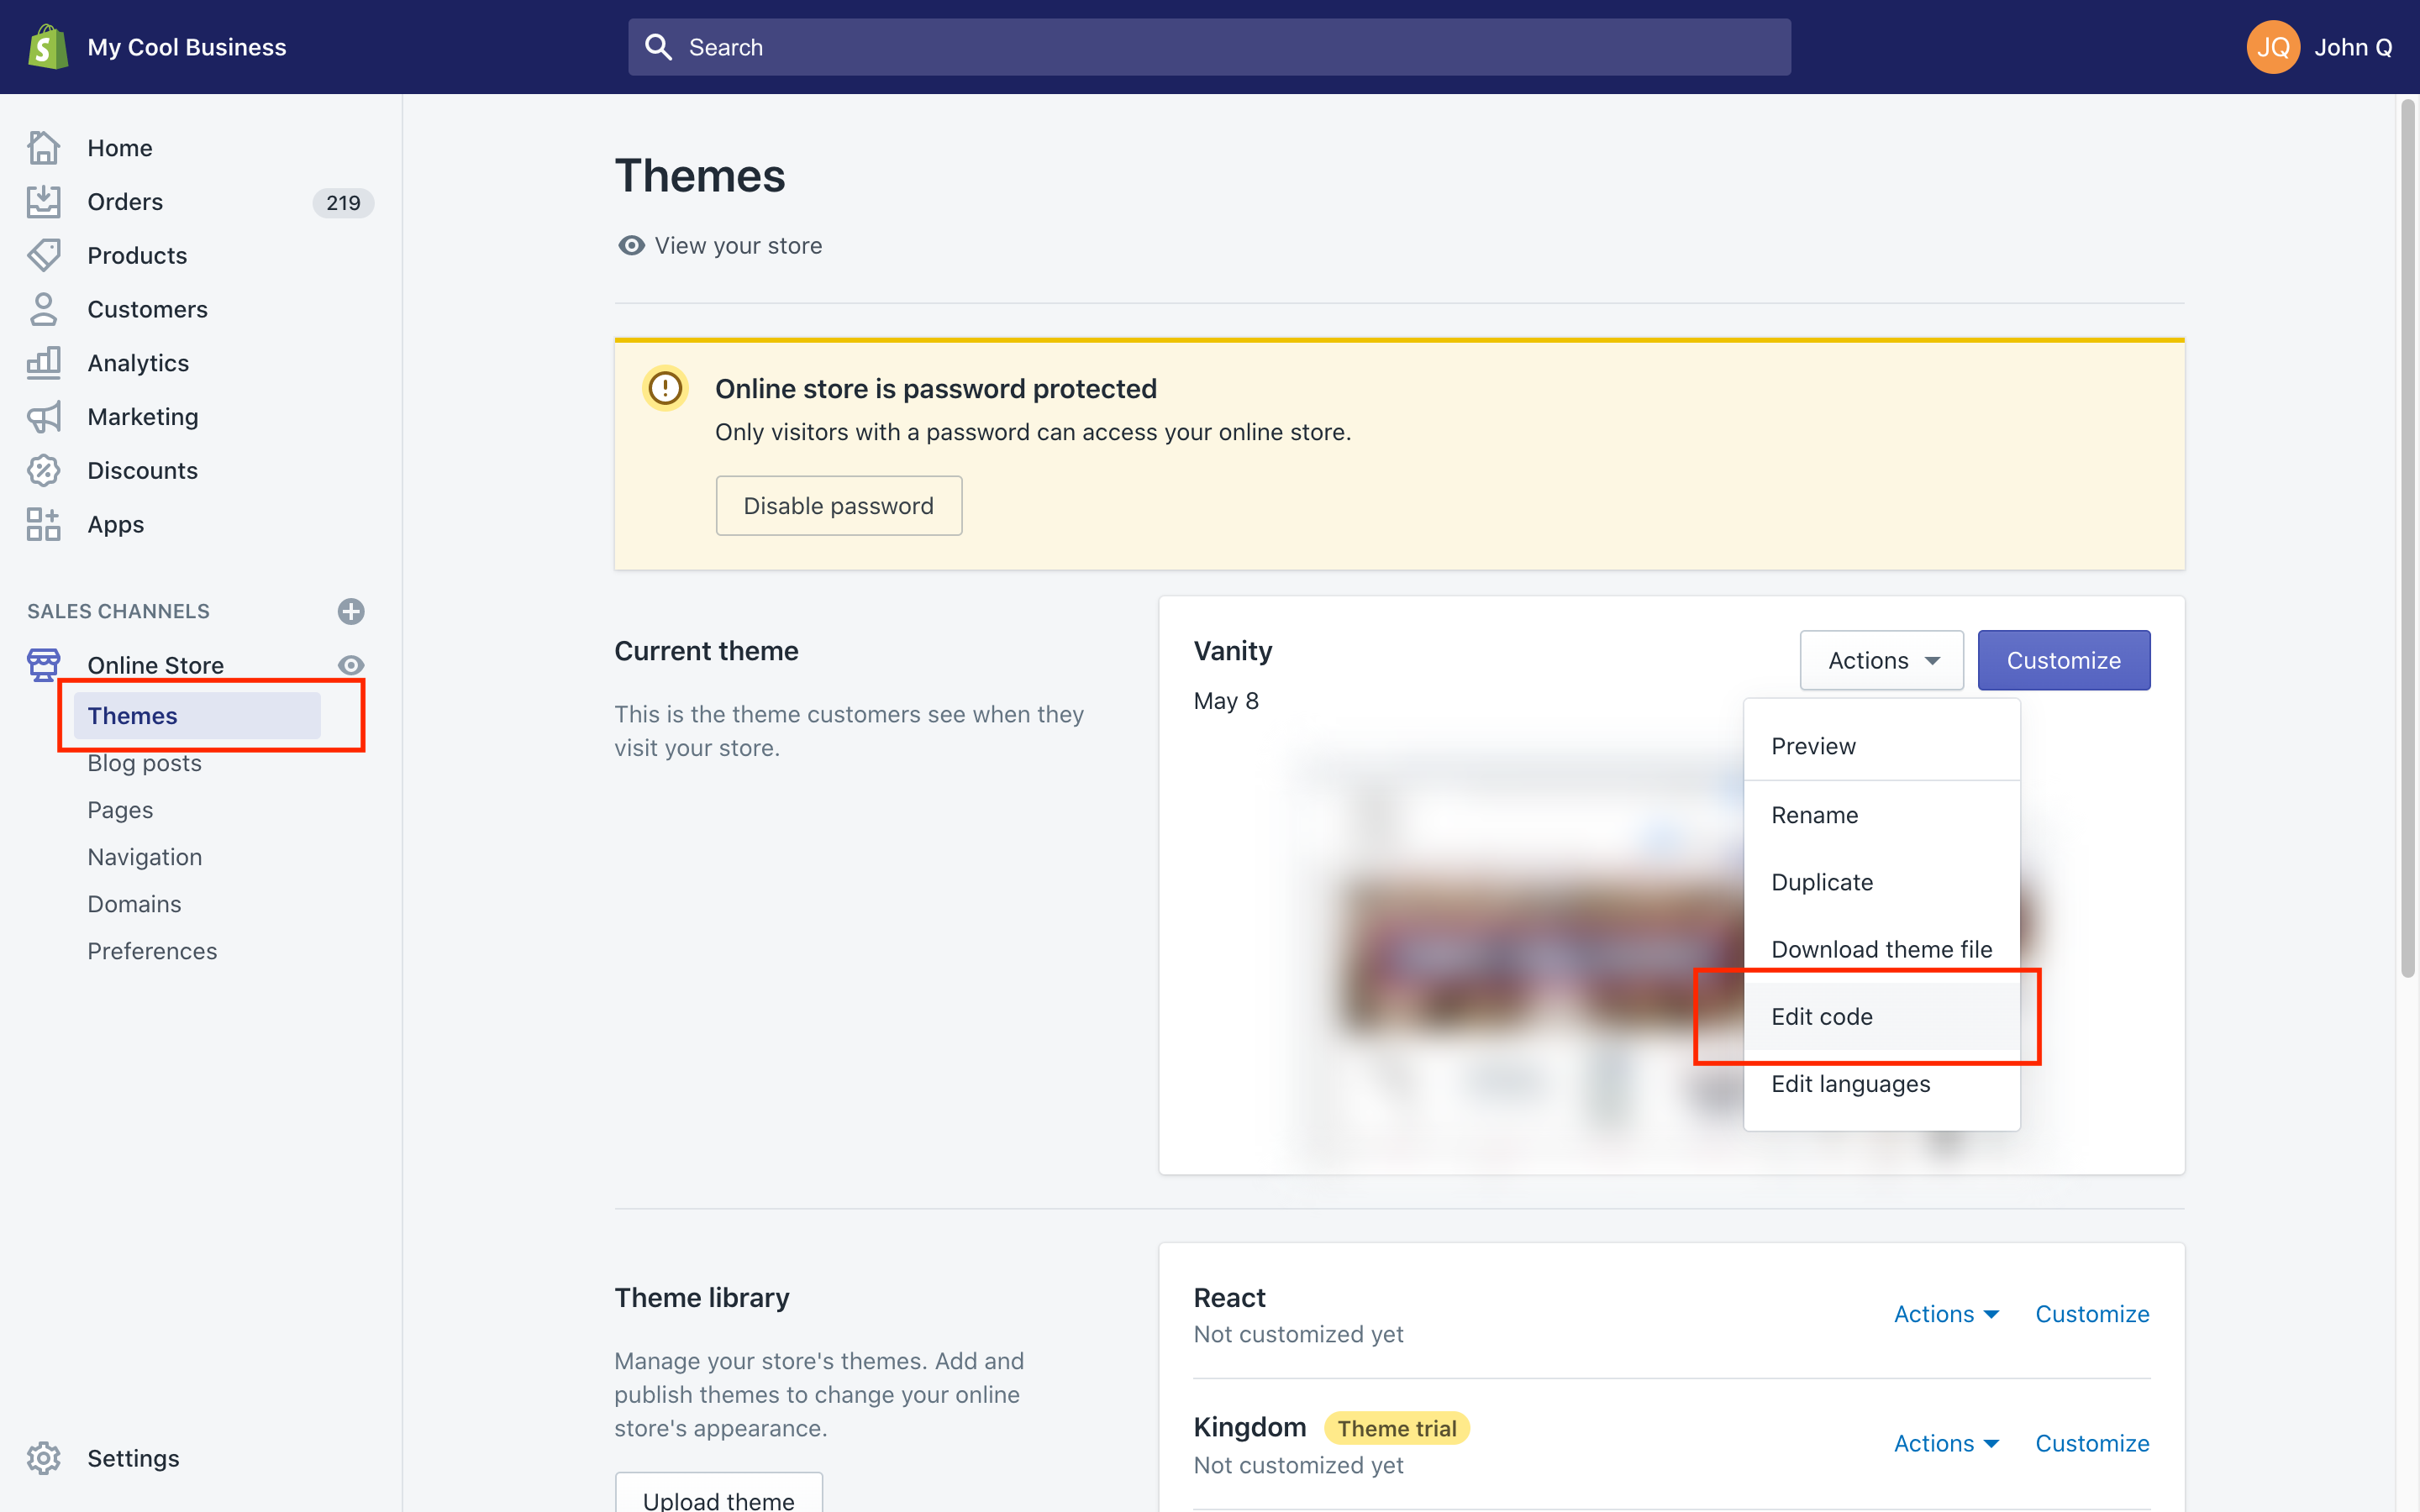
Select your shop's theme from: Sales Channels > Online Store > Themes and in the Current theme viewer, click the Actions button to reveal the dropdown. From this dropdown list select Edit code.
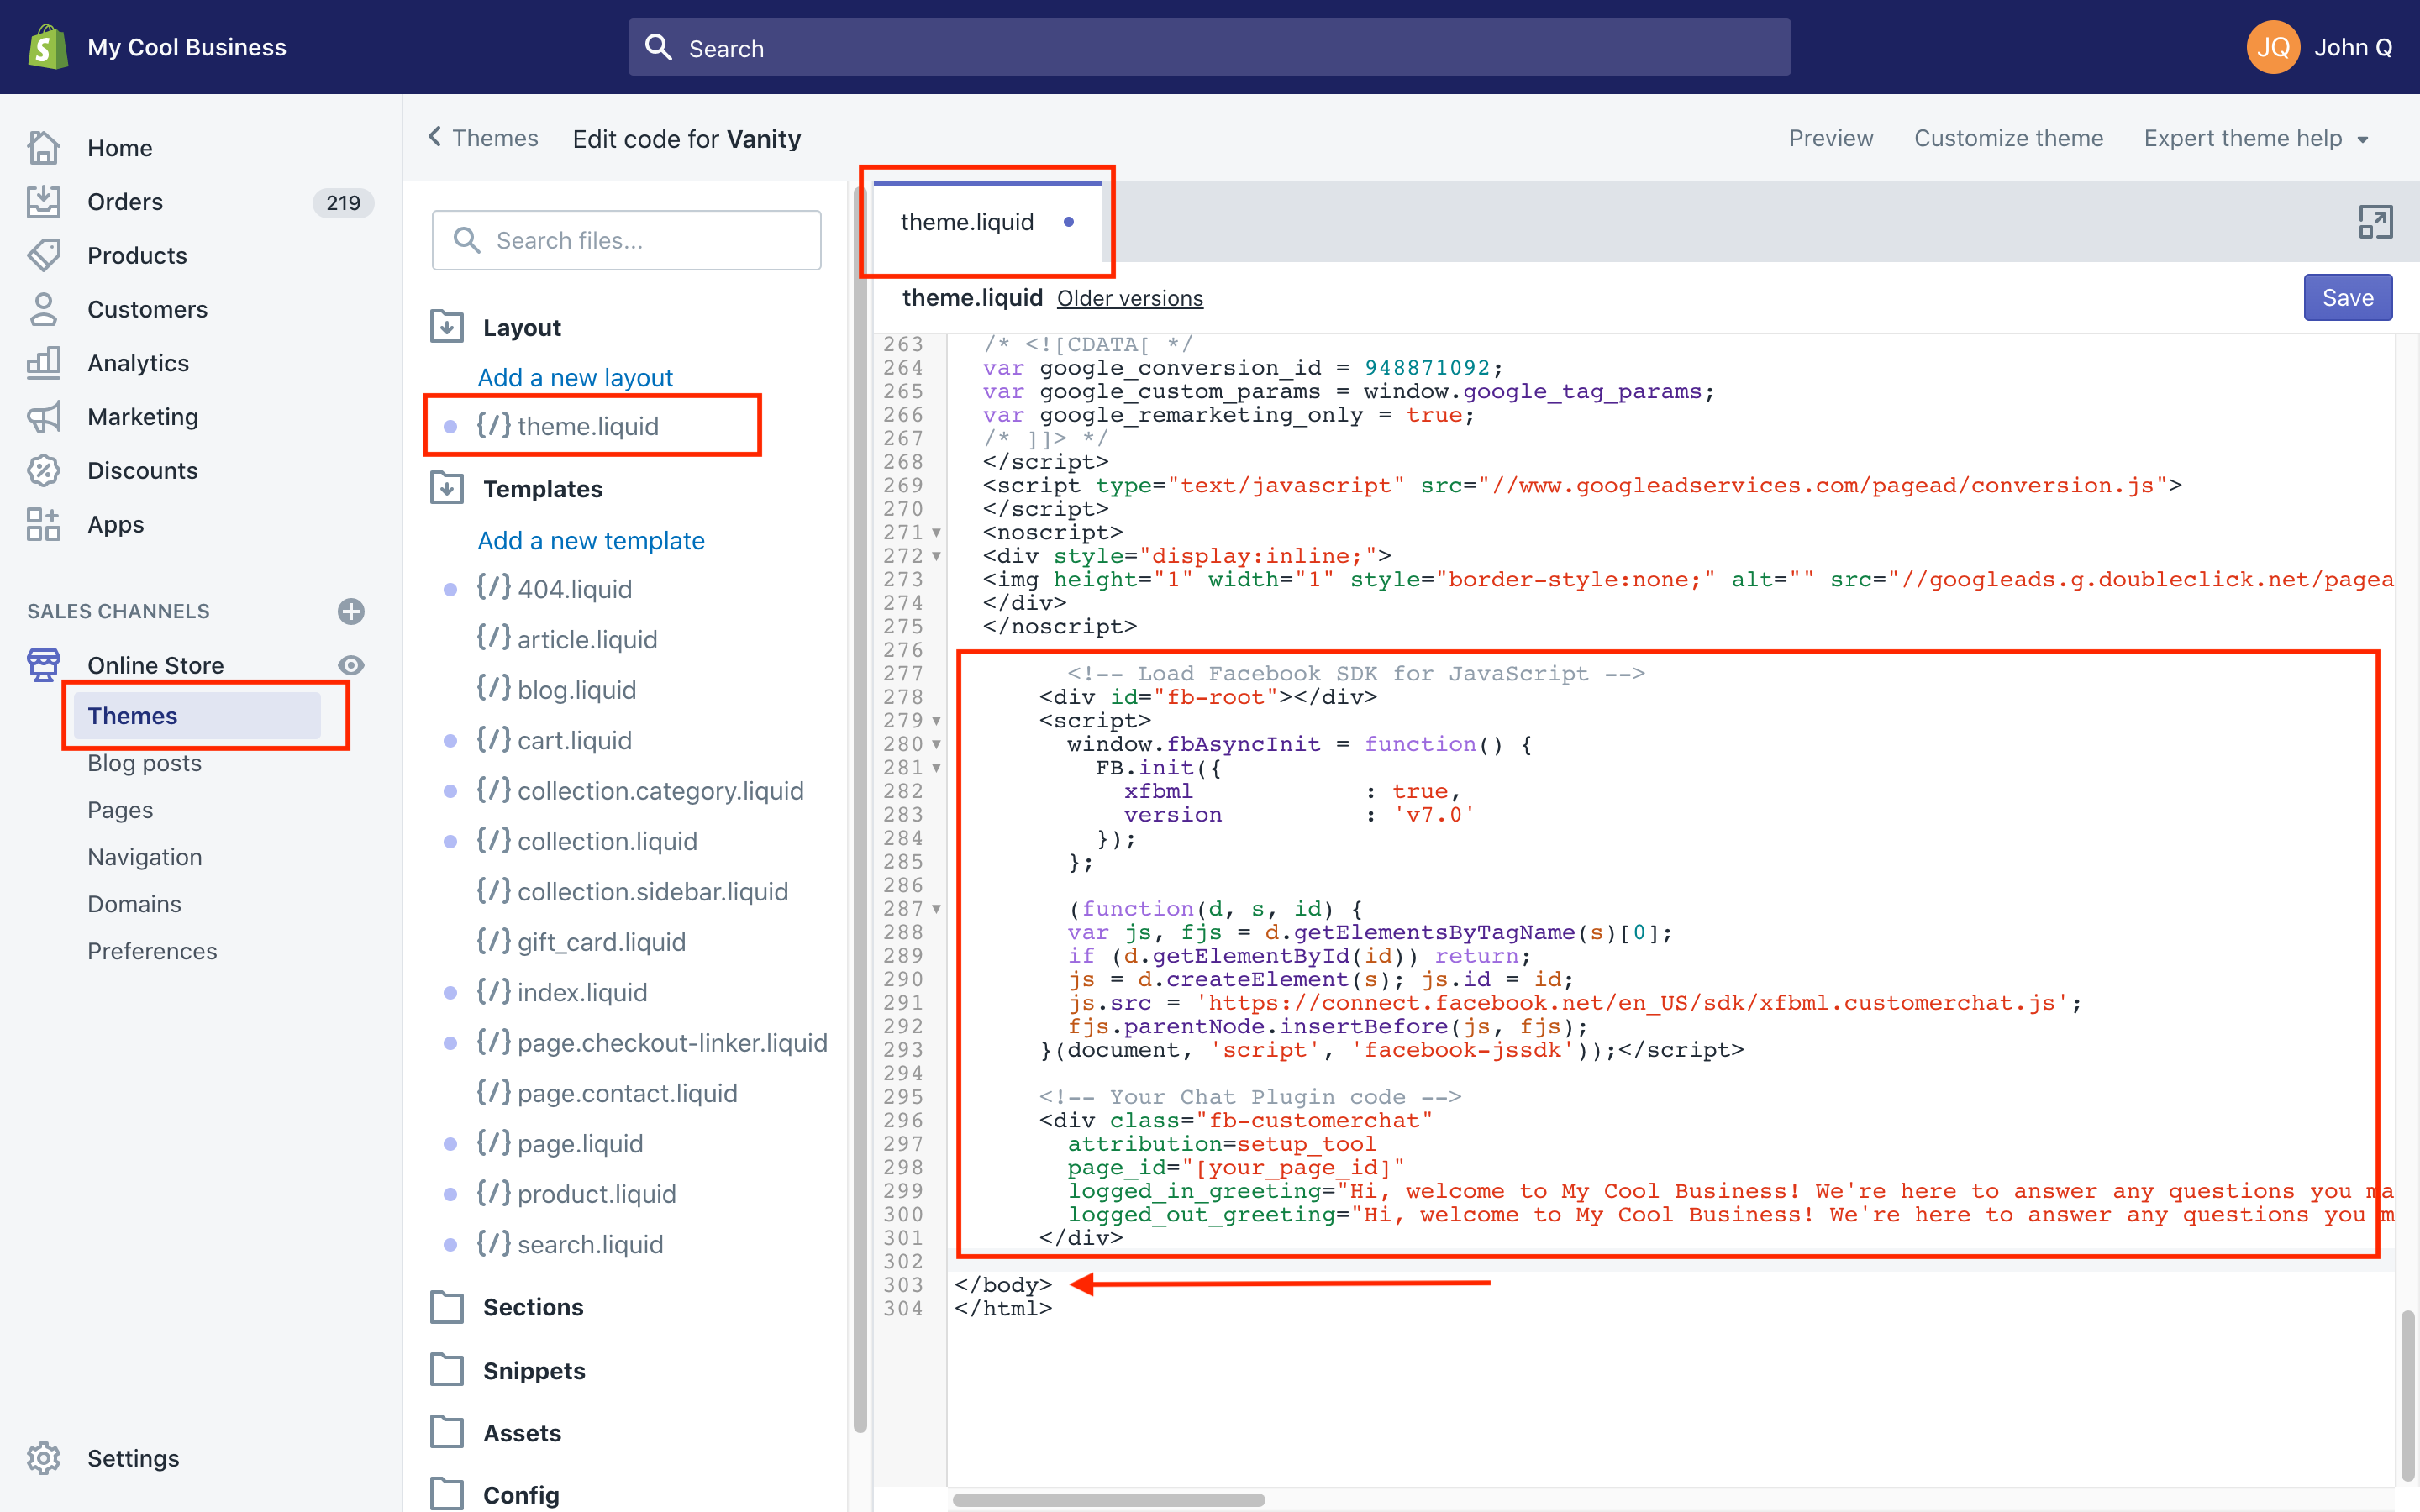
Copy the plugin code from Facebook and paste it anywhere between the opening <body> and closing </body> tags. We'd recommend just placing it at the bottom for the easiness of modifying it later if you have to - at least you know where to go hunting for it!
Save the theme and you're done!
Remember: You need to click Finish back on Facebook for the plugin to load if you haven't already!