Managing Your Business' Categories
Earlier, we introduced that categories are the way that Ralli ensures that your customers are talking to the right person in the business for their type of query from the get-go.
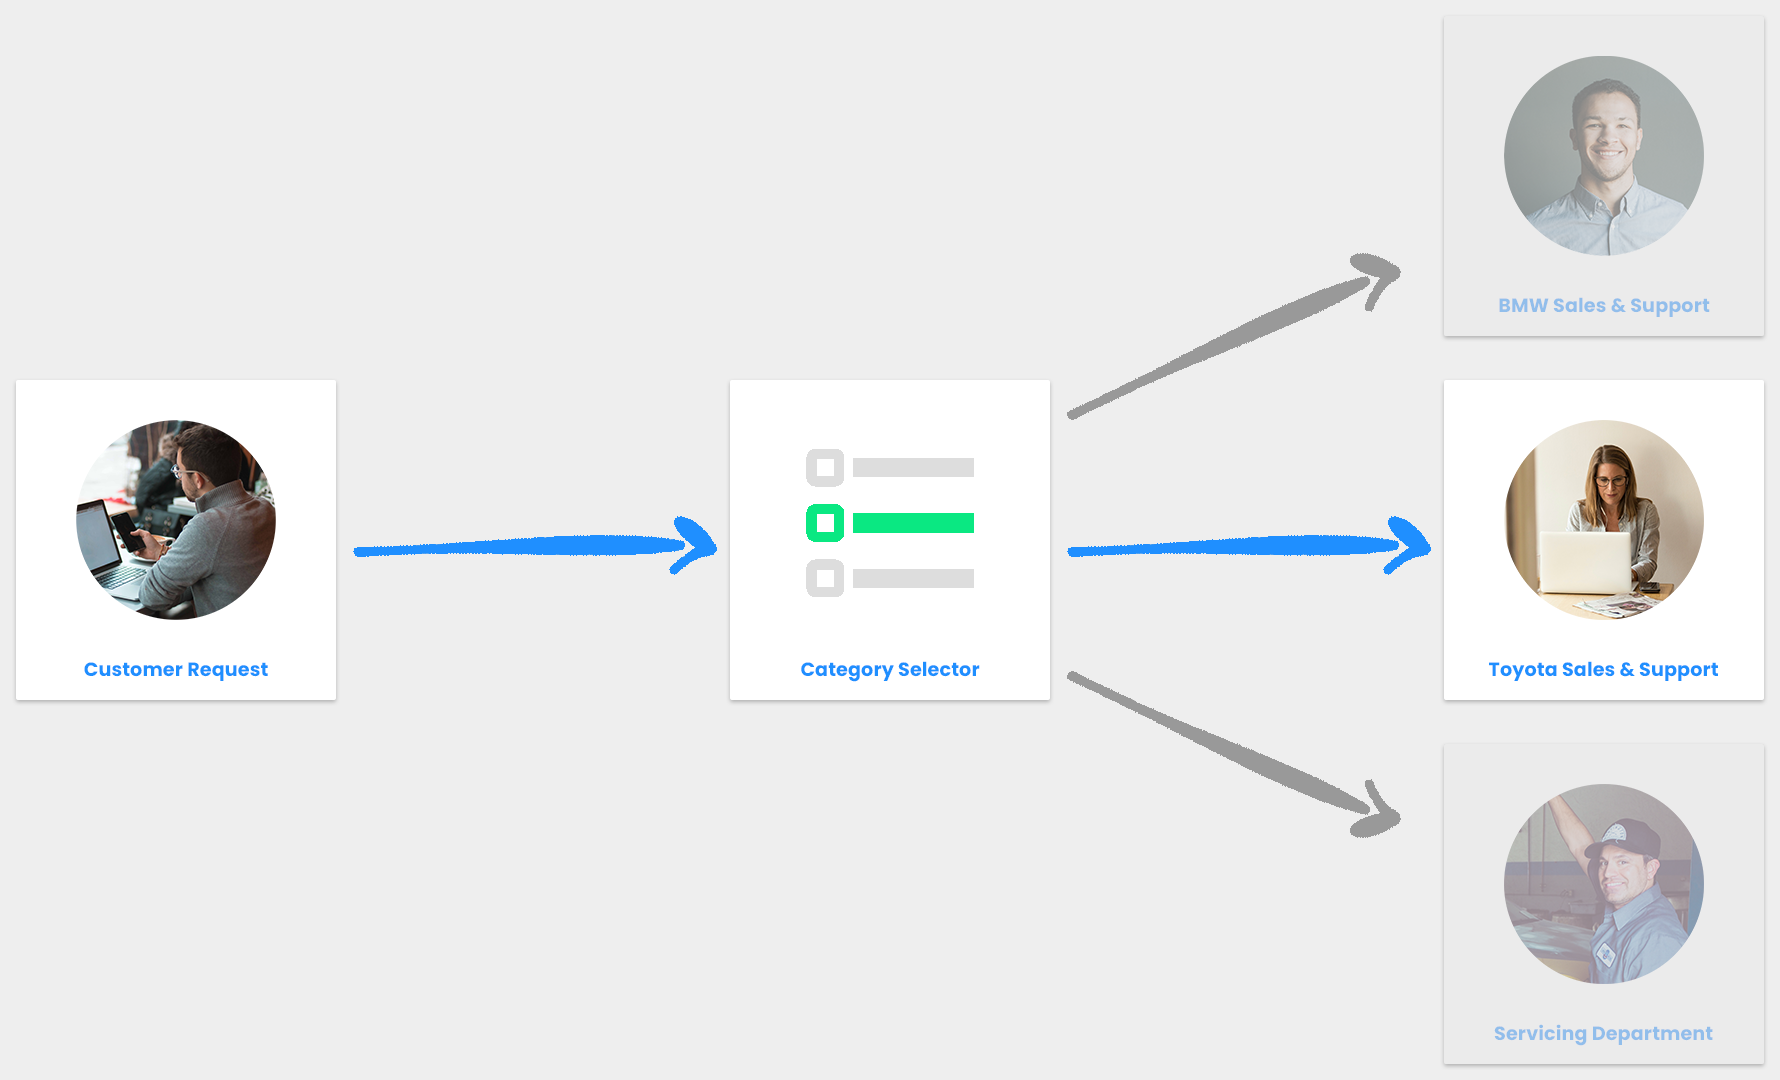
This article discusses the ways to manage categories within the Ralli platform, and assumes you have an understanding of what categories are, and have setup your Ralli business.
Categories are not mandatory, and Ralli works perfectly well if you don't want to configure them. Read more about what happens if you would prefer not to use categories for your business.
Creating Categories
To create categories for your Messaging Channels, open the Messaging Channels dashboard in Ralli:
Open Ralli Messaging Channels
Opens in a new tab
And select the Messaging Channel you wish to work with (remember: each Messaging Channel has its own unique categories, so you may have to repeat this step for each channel even if they will be the same (sorry...)).
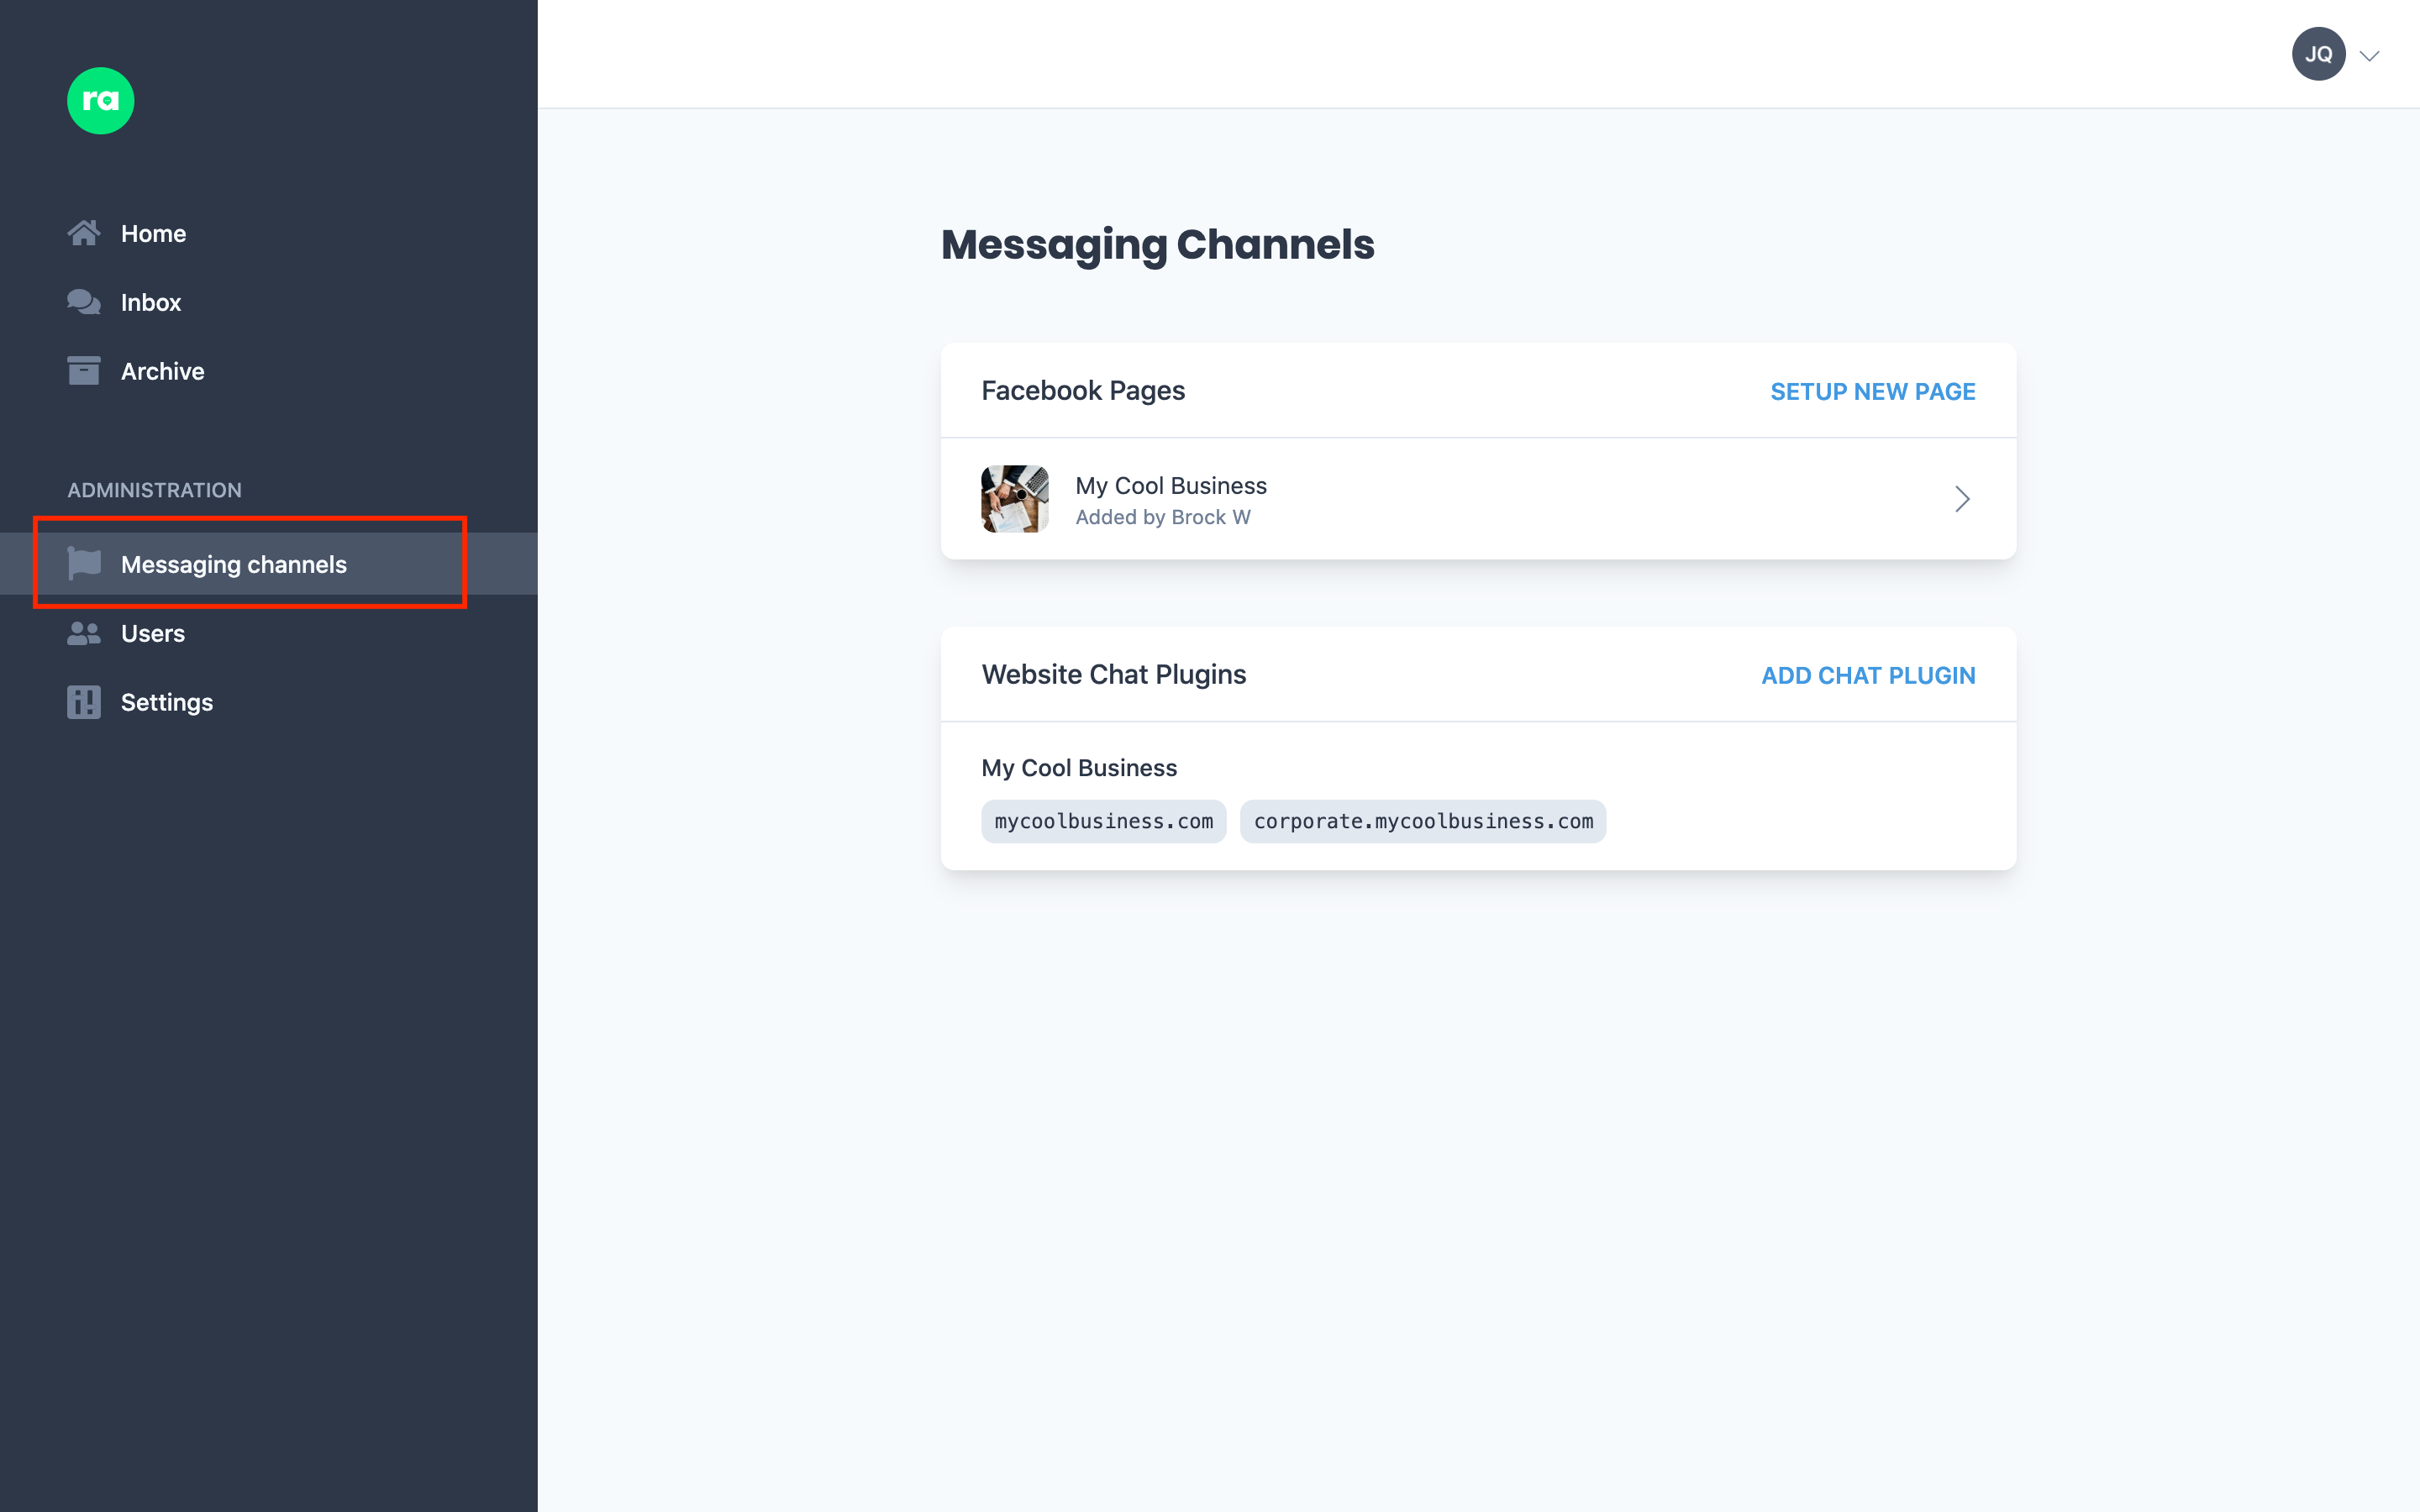
Facebook Messaging Channels
For a Facebook page, navigate to the Categories tab and select the Add New option.
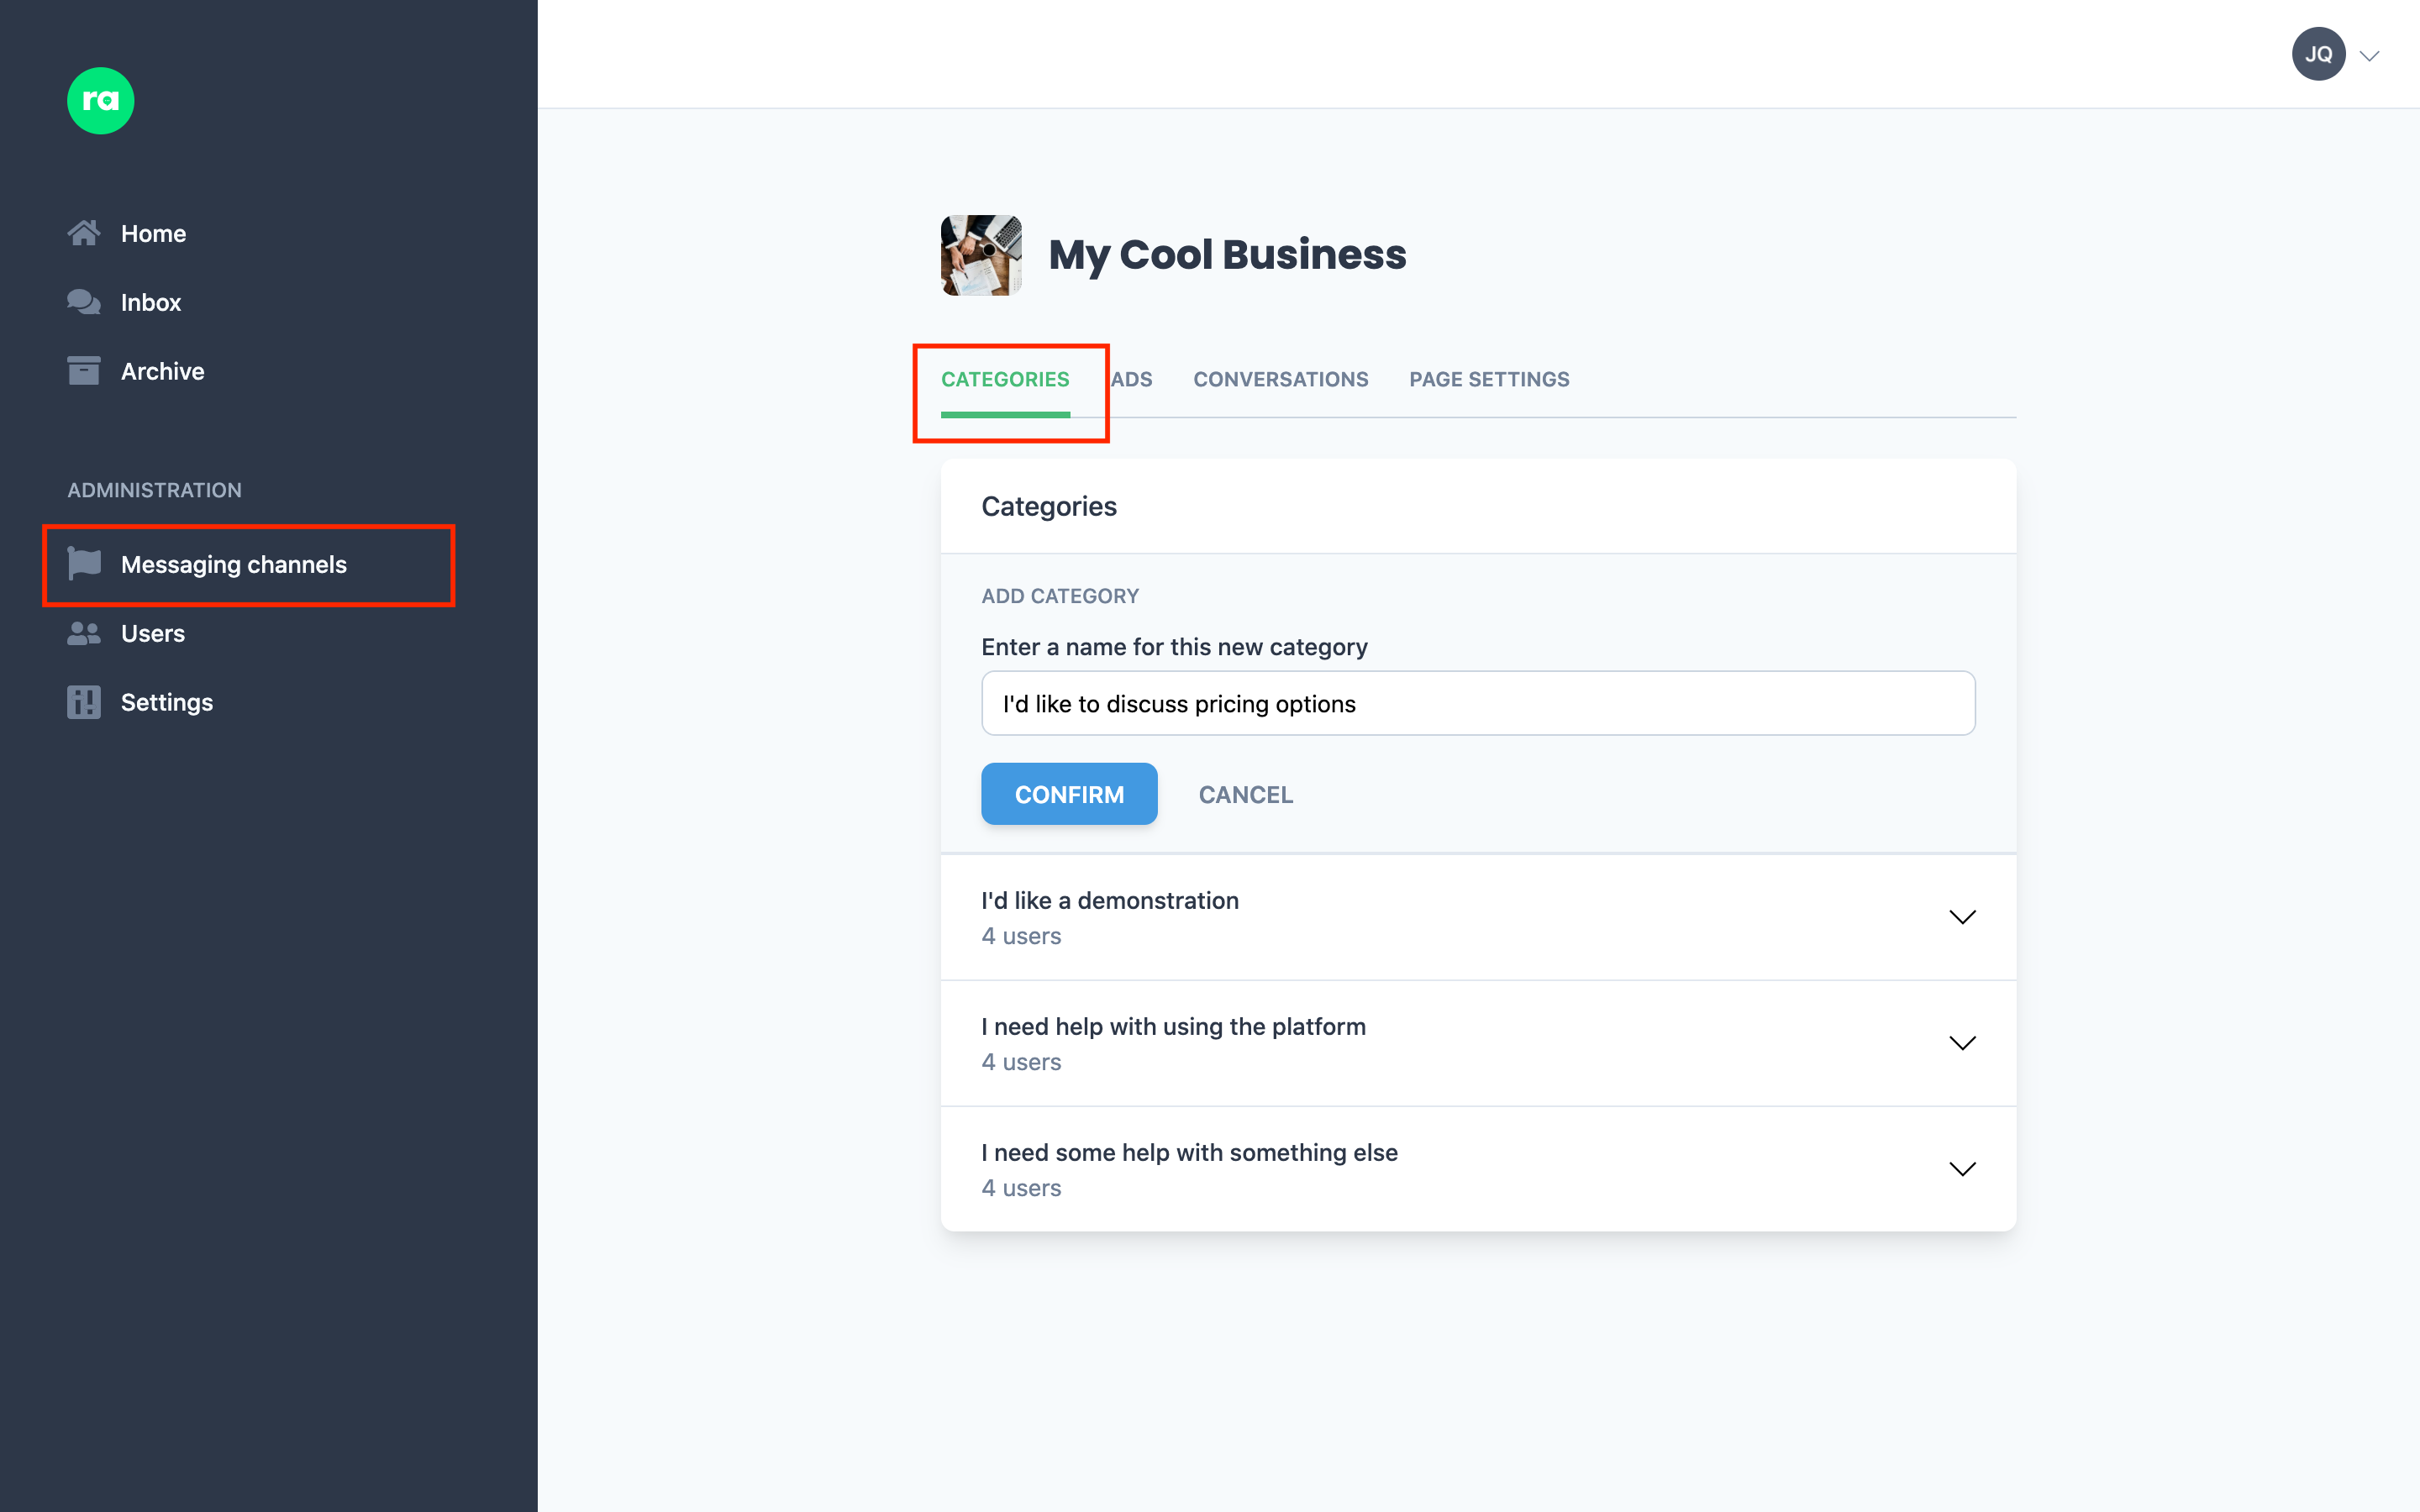
Enter the name of the category - note this is the value we will display back to your customers in the selector, so enter a value that is going to make sense to your customers.
Click Confirm to save changes.
All administrators of the business will be automatically assigned to the category, but other users will need to be manually selected. If you're happy with your categories, jump ahead to the user management section for more.
Website Plugin Messaging Channels
For a website integration, open the website Messaging Channel and scroll down to the Categories section.
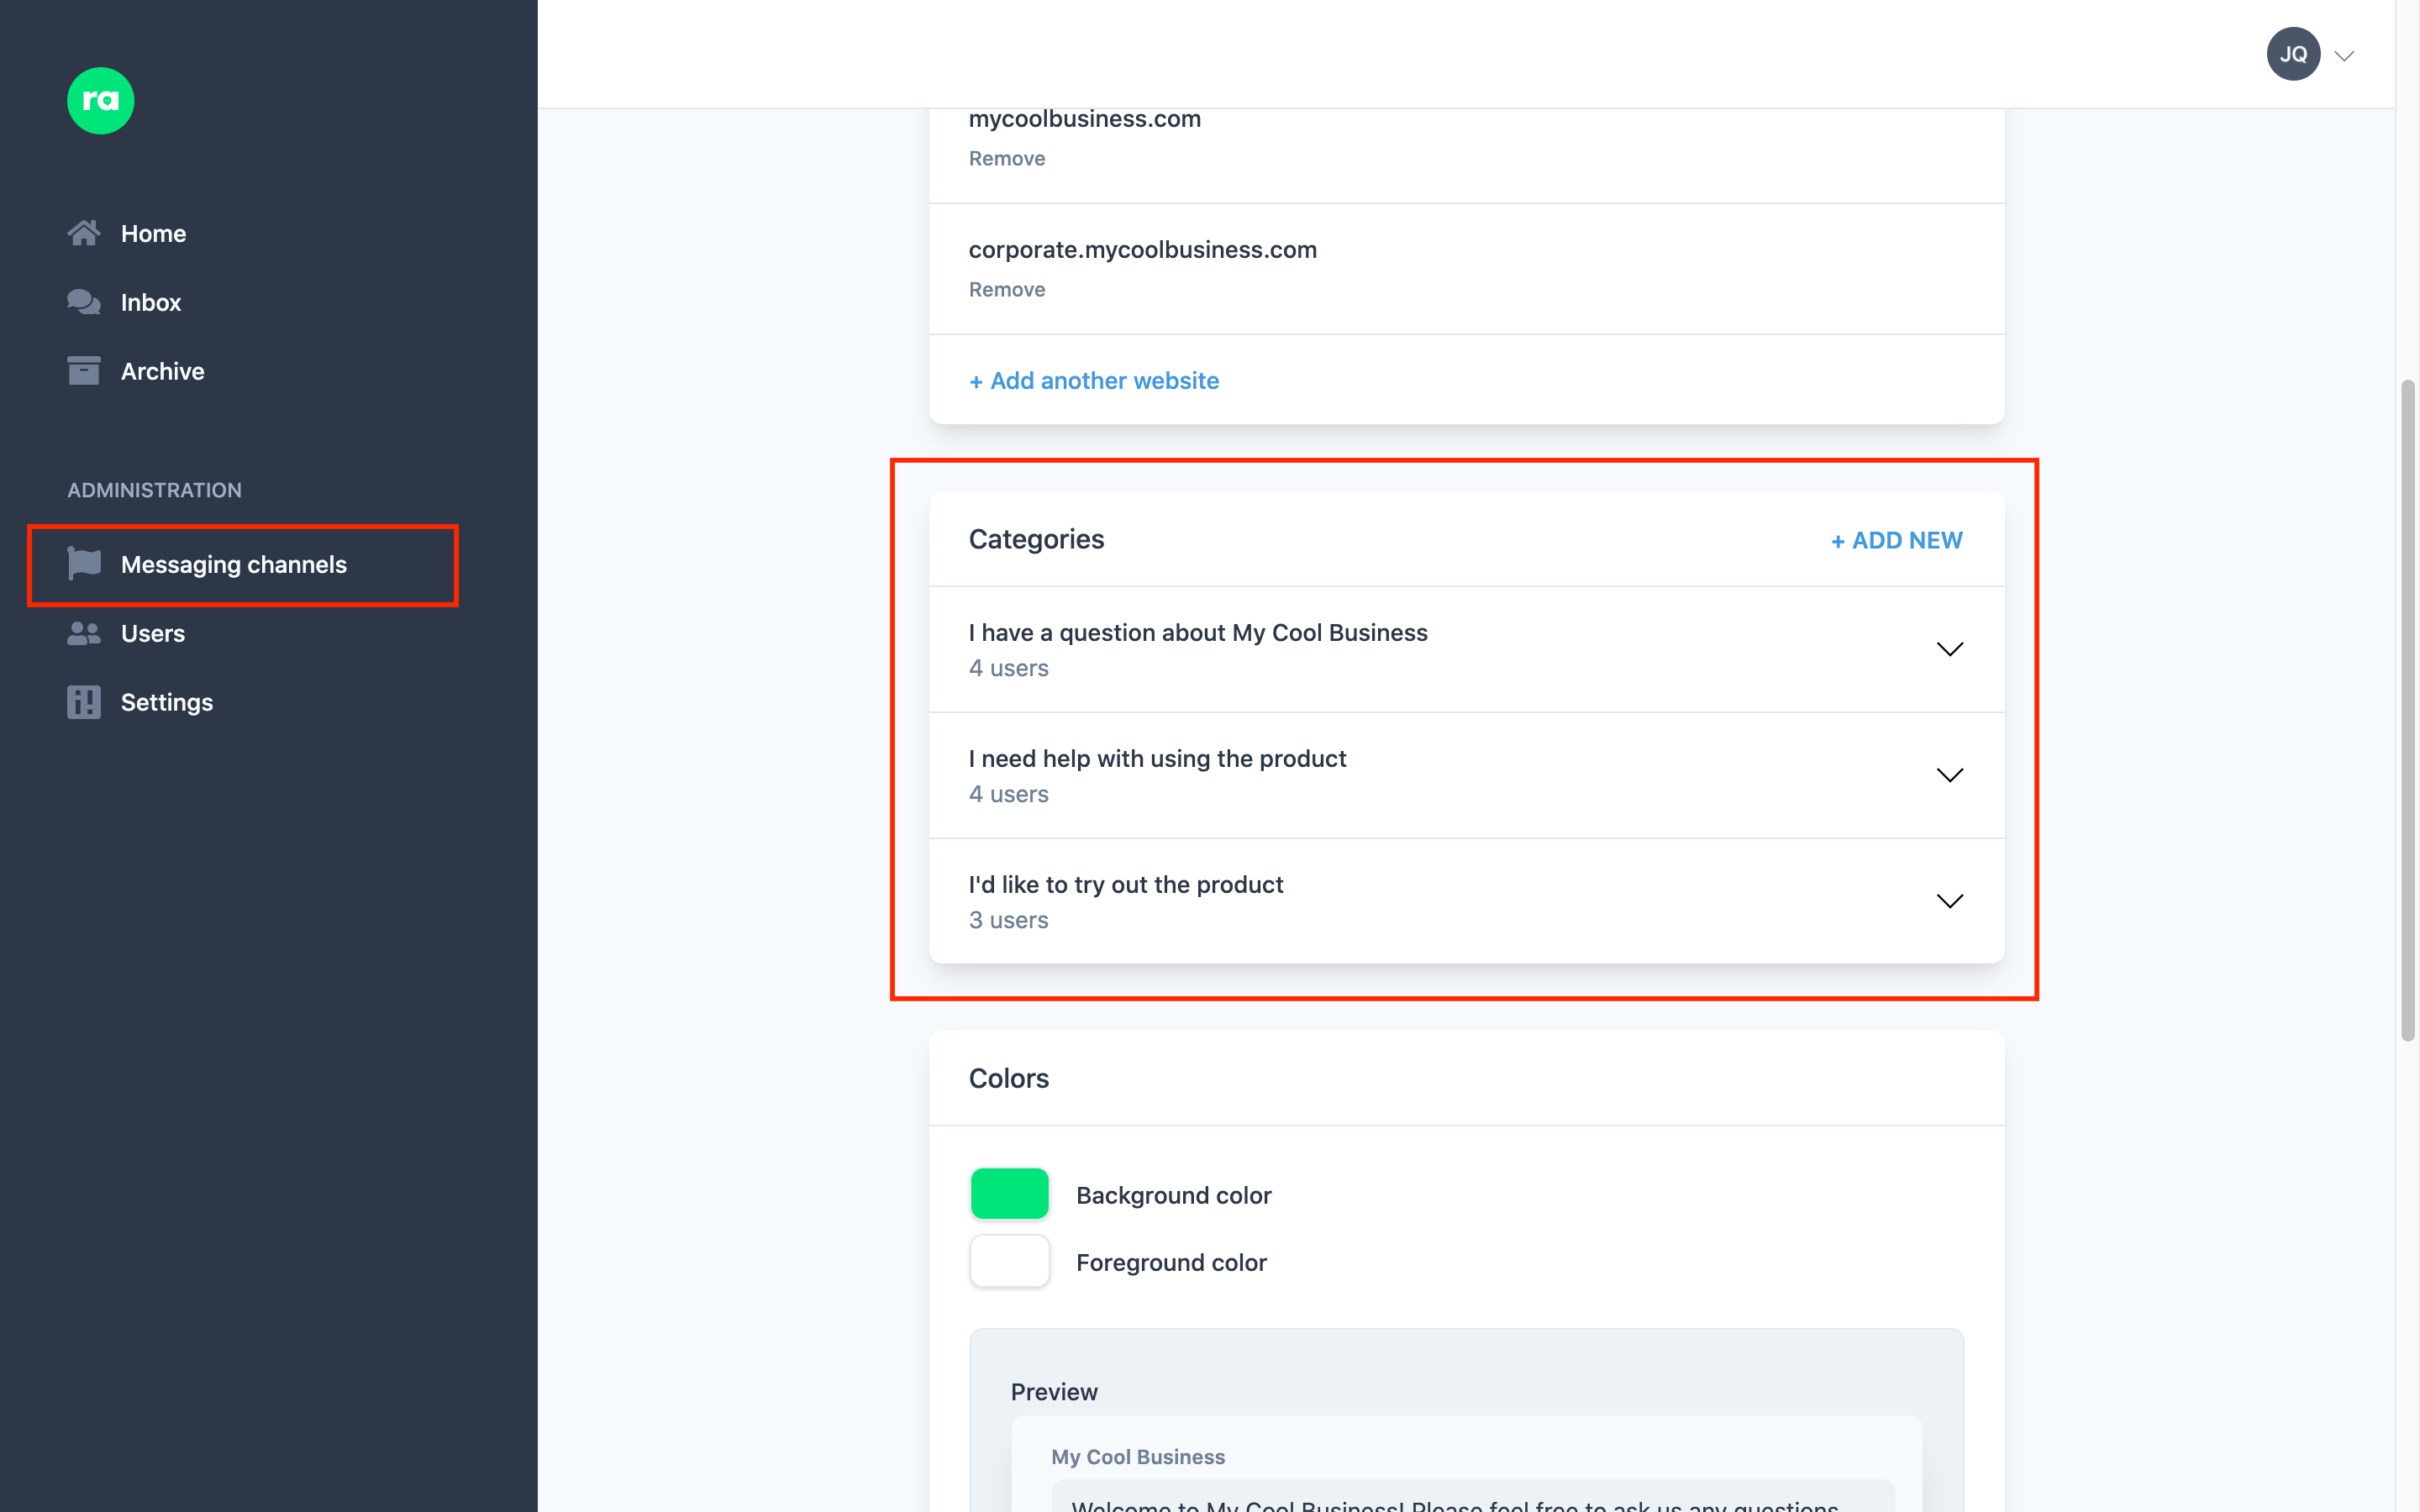
Click the Add New button and enter the name of the category. Note this is the value we will display back to your customers in the selector, so enter a value that is going to make sense to your customers.
Click Confirm to save changes.
All administrators of the business will be automatically assigned to the category, but other users will need to be manually selected. If you're happy with your categories, jump ahead to the user management section for more.
Managing Users
The easiest way to think about categories is to consider them "buckets" of users. Any time a conversation is assigned a category, all the users in that "bucket" are notified, and now able to communicate with the customer (you will only be notified once if you are a member of many categories ).
You'll want to assign the users in your business to the categories they're best suited to deal with. Adding (or removing) users from categories is simple.

Open the category you want to assign users to by clicking on it, and then click on Add User in the resulting drop down.
If the user is already a member of the business, just select their name and they will be automatically assigned to the category. If they aren't yet a member, you can invite them from here - we'll send them an email and help them get started. To learn more about managing your business' users, please read our article on user management.
Please note: This will only add these new users to new conversations going forward. It will not retroactively add these users to conversations that have already been started/assigned this category.
Removing a User
To remove a user, the steps are similar to adding them.
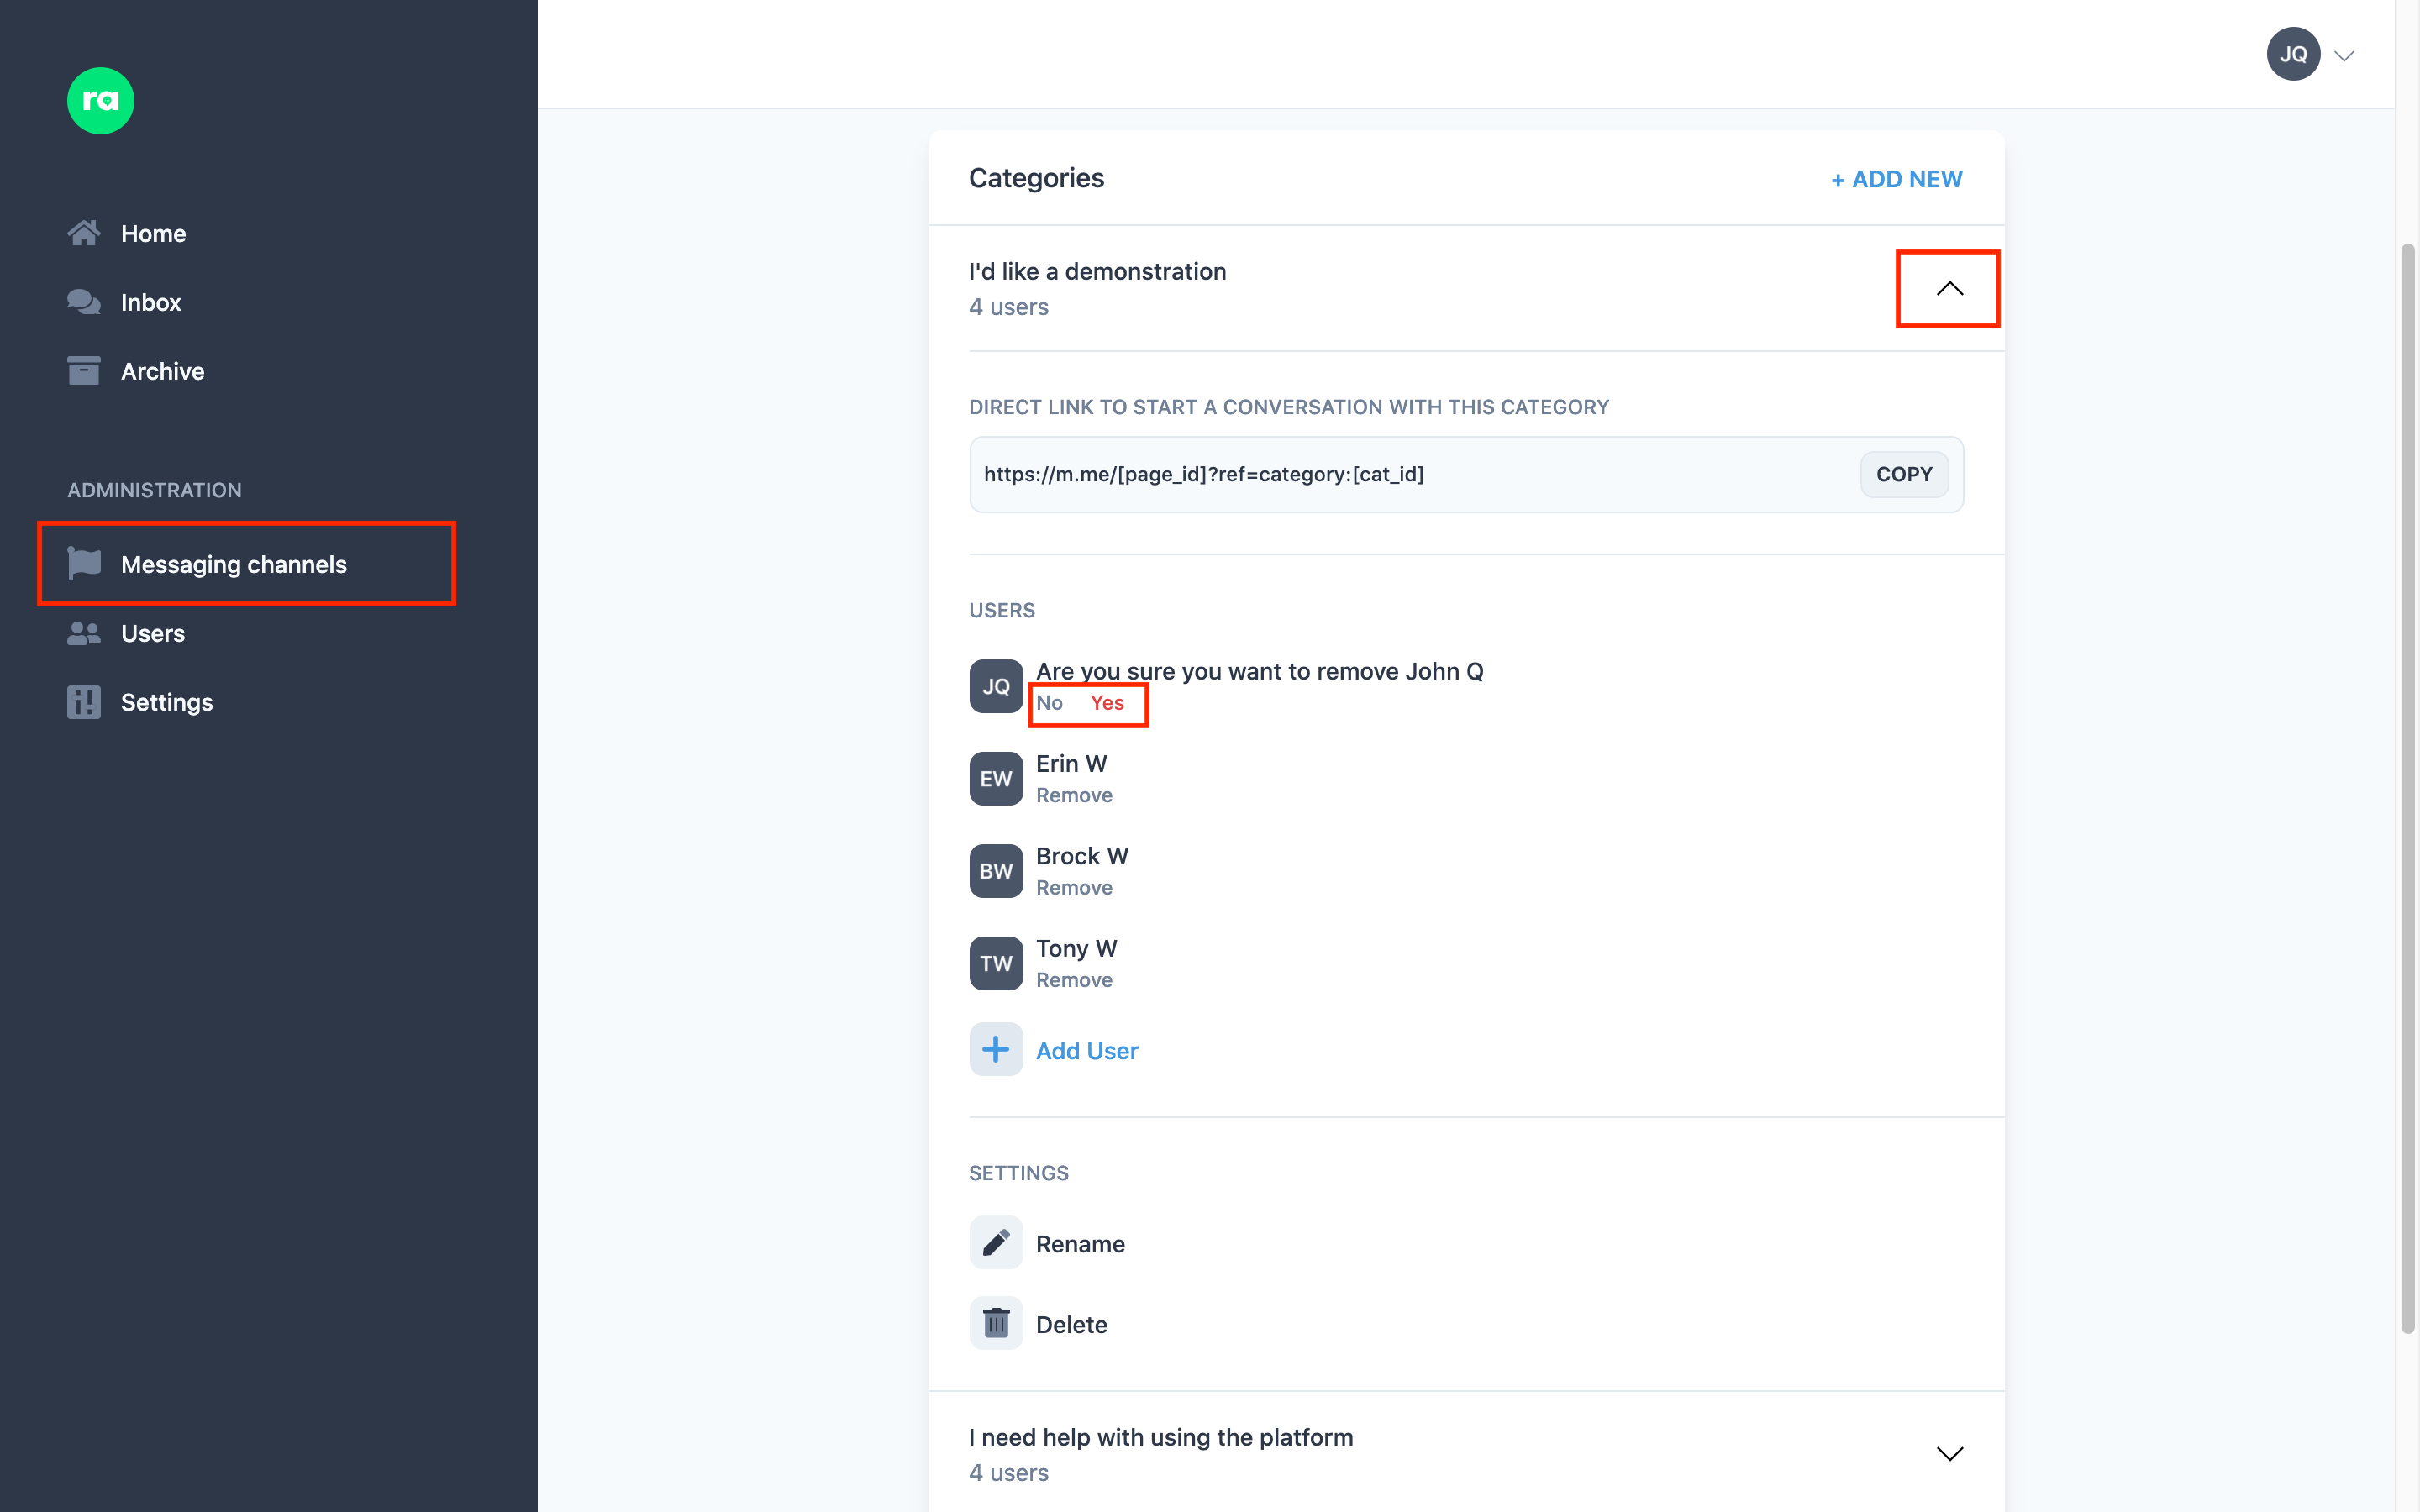
Open the category you want to remove users from by clicking on it, and then click on Remove for each user you wish to disassociate.
Please note: The effect is not retroactive. This user will continue to have access to the conversations they are already a member of.
A Note on Admins
By default, all administrators are added to every category. This gives the full visibility over how each conversation is going, and allows them to intervene quickly if need be.
However, this can get annoying when there is a lot of traffic, or when your business goes after hours. Check with the other admins if this is something you want to unsubscribe them from (they can always add themselves later) - or unsubscribe yourself if you don't want to be notified about every bit of activity going on.
Managing a Specific User's Category Subscription
If you'd like to control a single user's associations with categories, instead of wrestling with each individual category, open that user's management settings and control the categories they are subscribed to. To learn more about this, please read our article on user management.
Modifying and Removing Categories
If you find that a particular category is no longer working as intended. You can change its name (to keep all users already setup involved), or delete it altogether.
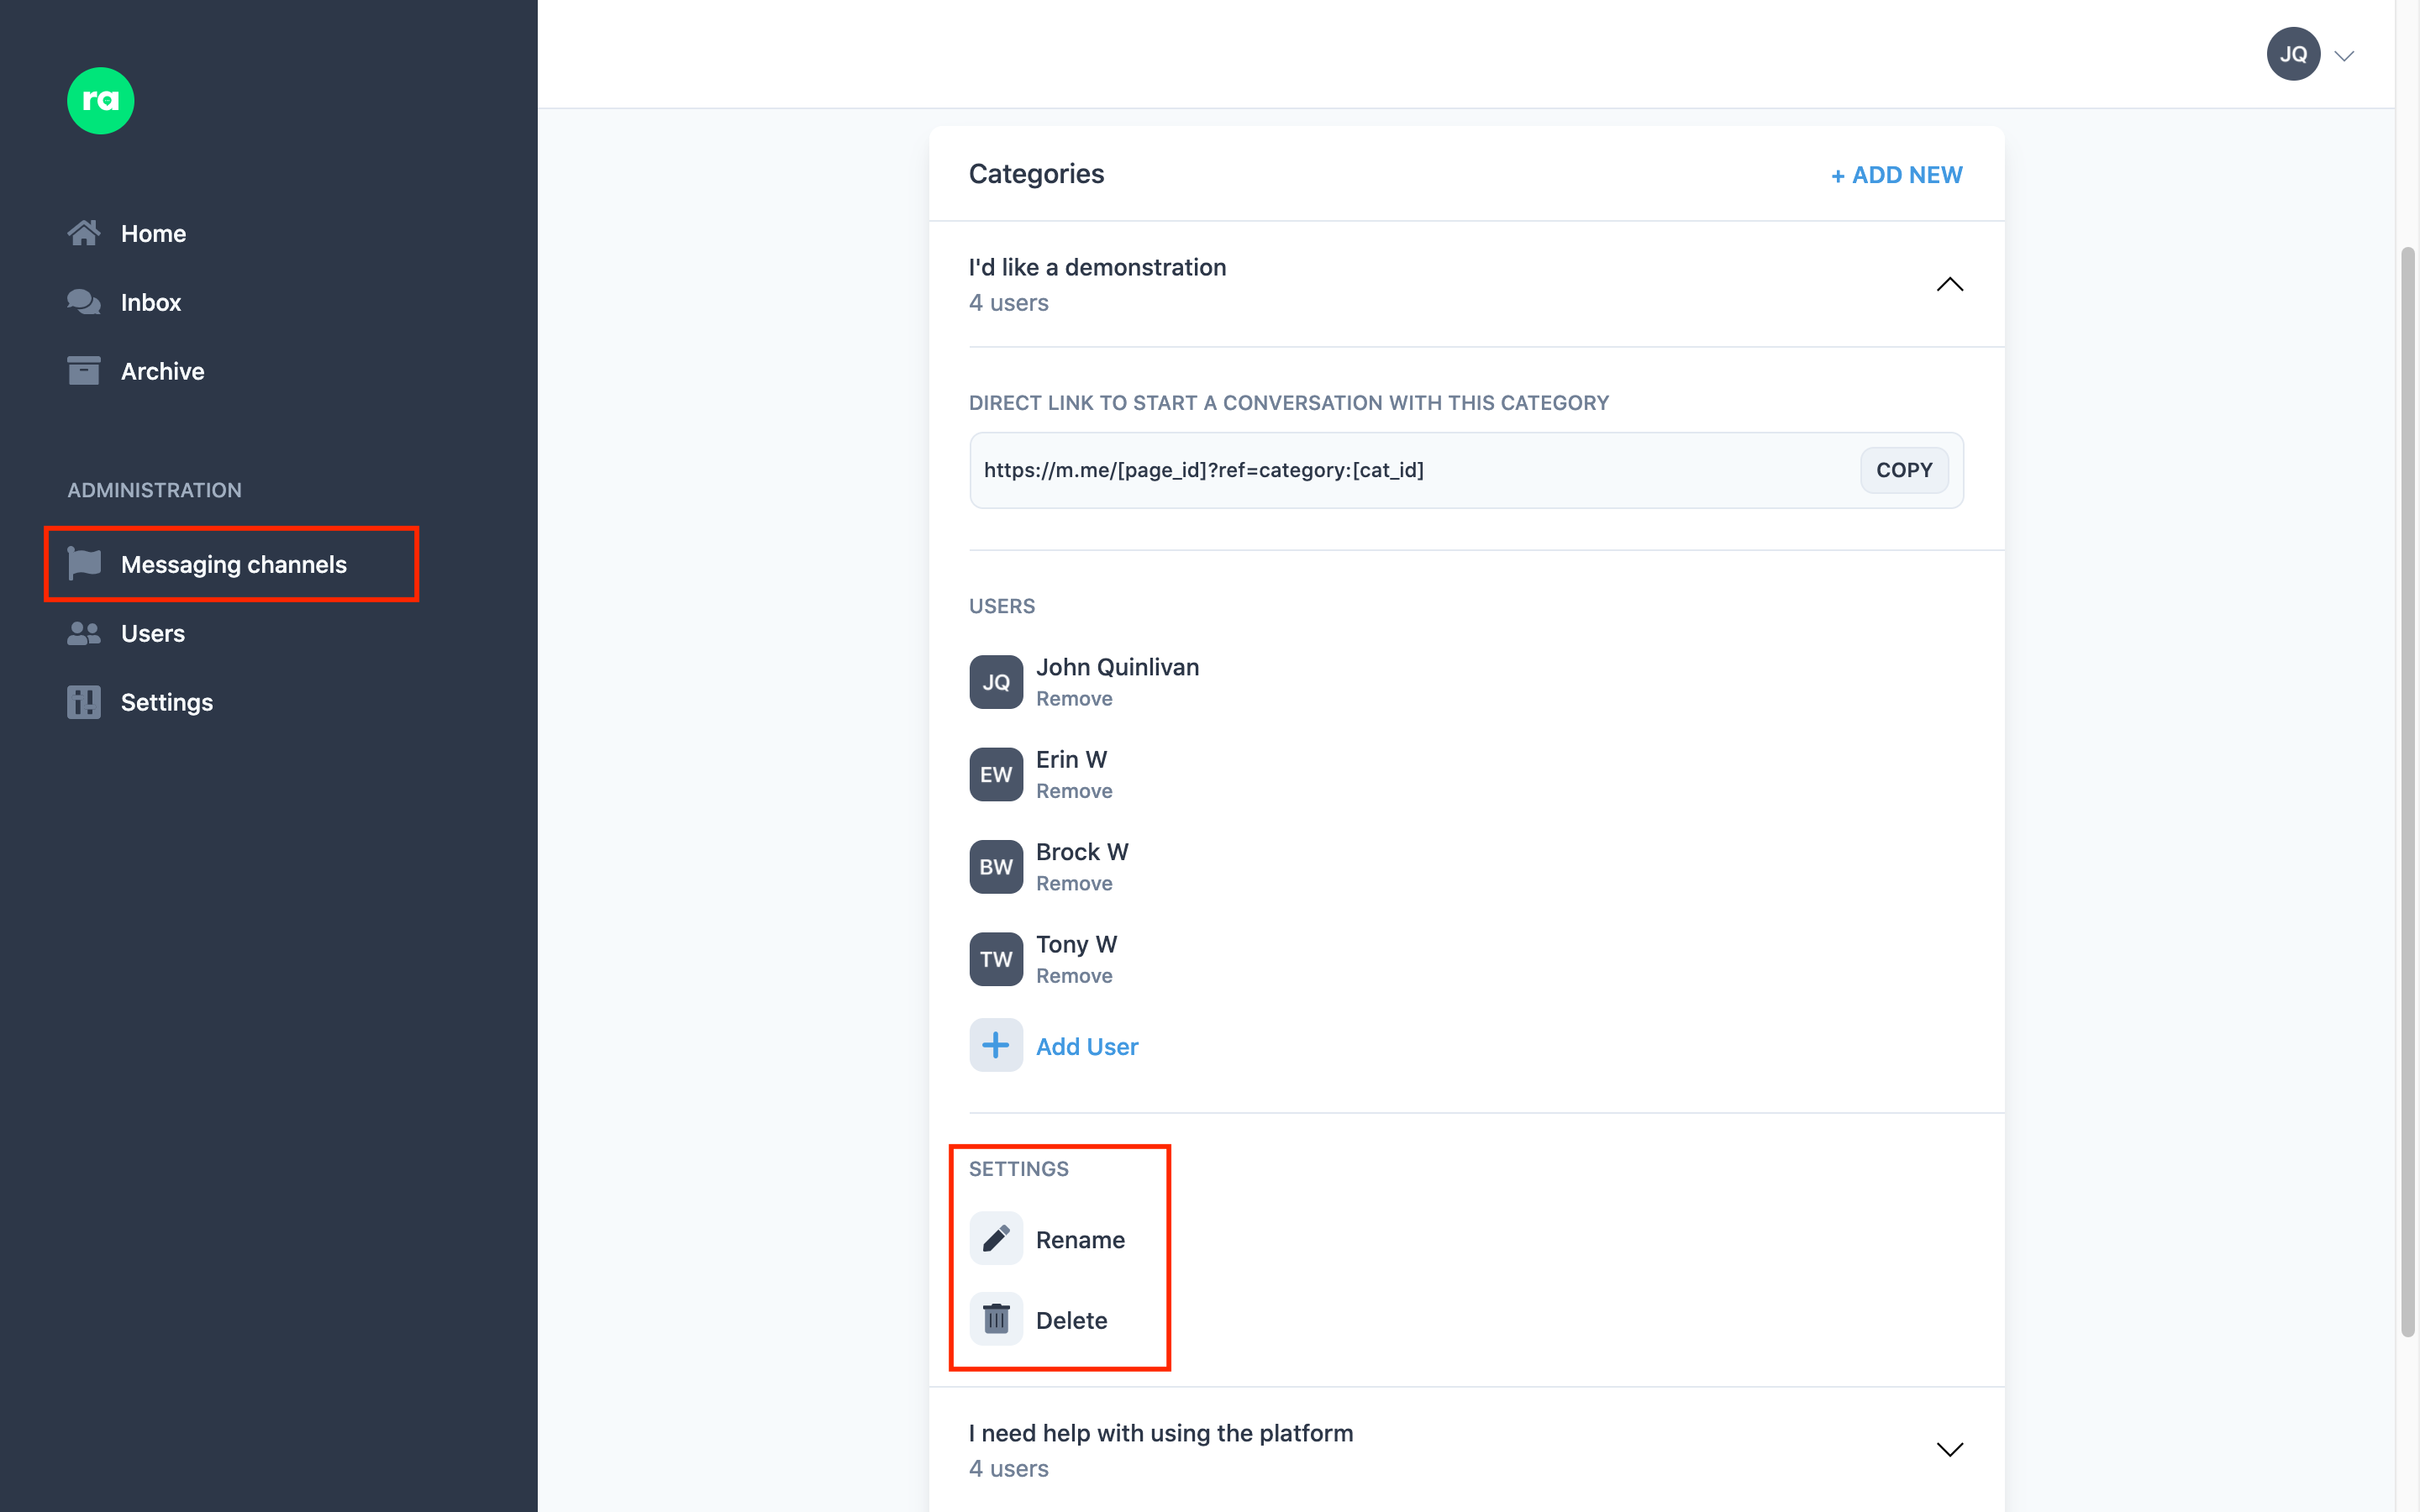
To do this, open the category from the relevant Messaging Channel by clicking on it and scrolling to the Settings section in the resulting category drop down.
Changing a Category's Name
Changing the category name will not impact the flow of existing conversations. The name of the category will change on the website and the apps (and so you may want to notify staff before doing this), and the value displayed back to customers on the category selector will be updated - but the users associated with this category will not otherwise be affected by this.
Deleting a Category
Removing a category will not retroactively remove existing conversations. Any conversations still active for this category will become unassigned (i.e. now have no category associated with them), but the users involved in these existing conversations will not change - and the conversation will remain open for chatting.
If you wish to remove or close/archive conversations associated with this category, you will have to do this manually.
Otherwise, the category will be immediately removed from the selector, users will no longer be able to assign conversations to it, and no new conversations can be started about it.
What Happens if a User Skips the Selector or Needs Something Else?
Not every customer wish can be properly encapsulated within a finite set of categories. In cases where users don't get assigned into a category, the conversation becomes unassigned. All admins in your business are then notified of this request, and the admins can then assign it to the relevant people in the business to assist (or manage the customer themselves).
What Happens if I Don't (Want to) Use Categories?
Using categories is up to you, and is totally driven by your business' needs. Whilst we believe it is useful for efficiency within a business, it is by no means appropriate for every business out there.
If you choose not to use categories, every new conversation will come in unassigned. All users will be notified about it and it becomes the responsibility of users to join into these conversations themselves.
This can be really effective in smaller businesses, or where your users are particular tech-active and well managed. It also works in scenarios where you may have a roster setup for dealing with sales and support, or you wish to allow your customers a more open-ended experience for chat (making Ralli a thin wrapper around many clients, rather than overly augmenting them).