Adding Ralli to Your Facebook Page
Note: This step will require you to have a Facebook page for your business - and for you to be an administrator of this page. Please check that on Facebook, and make sure you have permission, before continuing.
A note about the images on this page: Facebook likes to change their dialogs fast and regular and on different platforms. Please don't worry if yours don't look exactly like the ones posted here, it'll still allow us to do the same things we need to do.
The Ralli Plugin for Facebook Messenger is a great way to talk to customers coming in from Facebook. The process is a super simple, one-click(ish...), install for Ralli to your Facebook page.
Any time a customer starts a conversation with your business on Facebook Messenger, you will get a notification on Ralli. All you (and/or your team) need to do is respond with the Ralli apps and that customer will see the responses.
This is perfect as it gives you better:
- Visibility over chats coming in from different places
- Visibility over how your staff are responding to messages on social media
- Control over who should be responding to what sort of requests
It also gives your customers the freedom to talk to you in a way they are most comfortable with - and see who it is that they are talking to from your business. Many people have a Facebook account, and understand the processes there, versus working with an anonymous chat pop-up on a website.
Live Chat Plugin Upgrades
If you activate Facebook, then the Ralli live chat plugin will allow customers to use their Facebook account to talk to you on your website (like magic !).
This extra layer of user choice should increase engagement levels and reduce customer's anxiety when dealing with your page (and is totally optional).
Setting up with Facebook
To install Ralli to your Facebook page, you will need to create a new Facebook Messaging Channel. To do this:
Add Ralli to your Facebook Page
Opens in a new tab
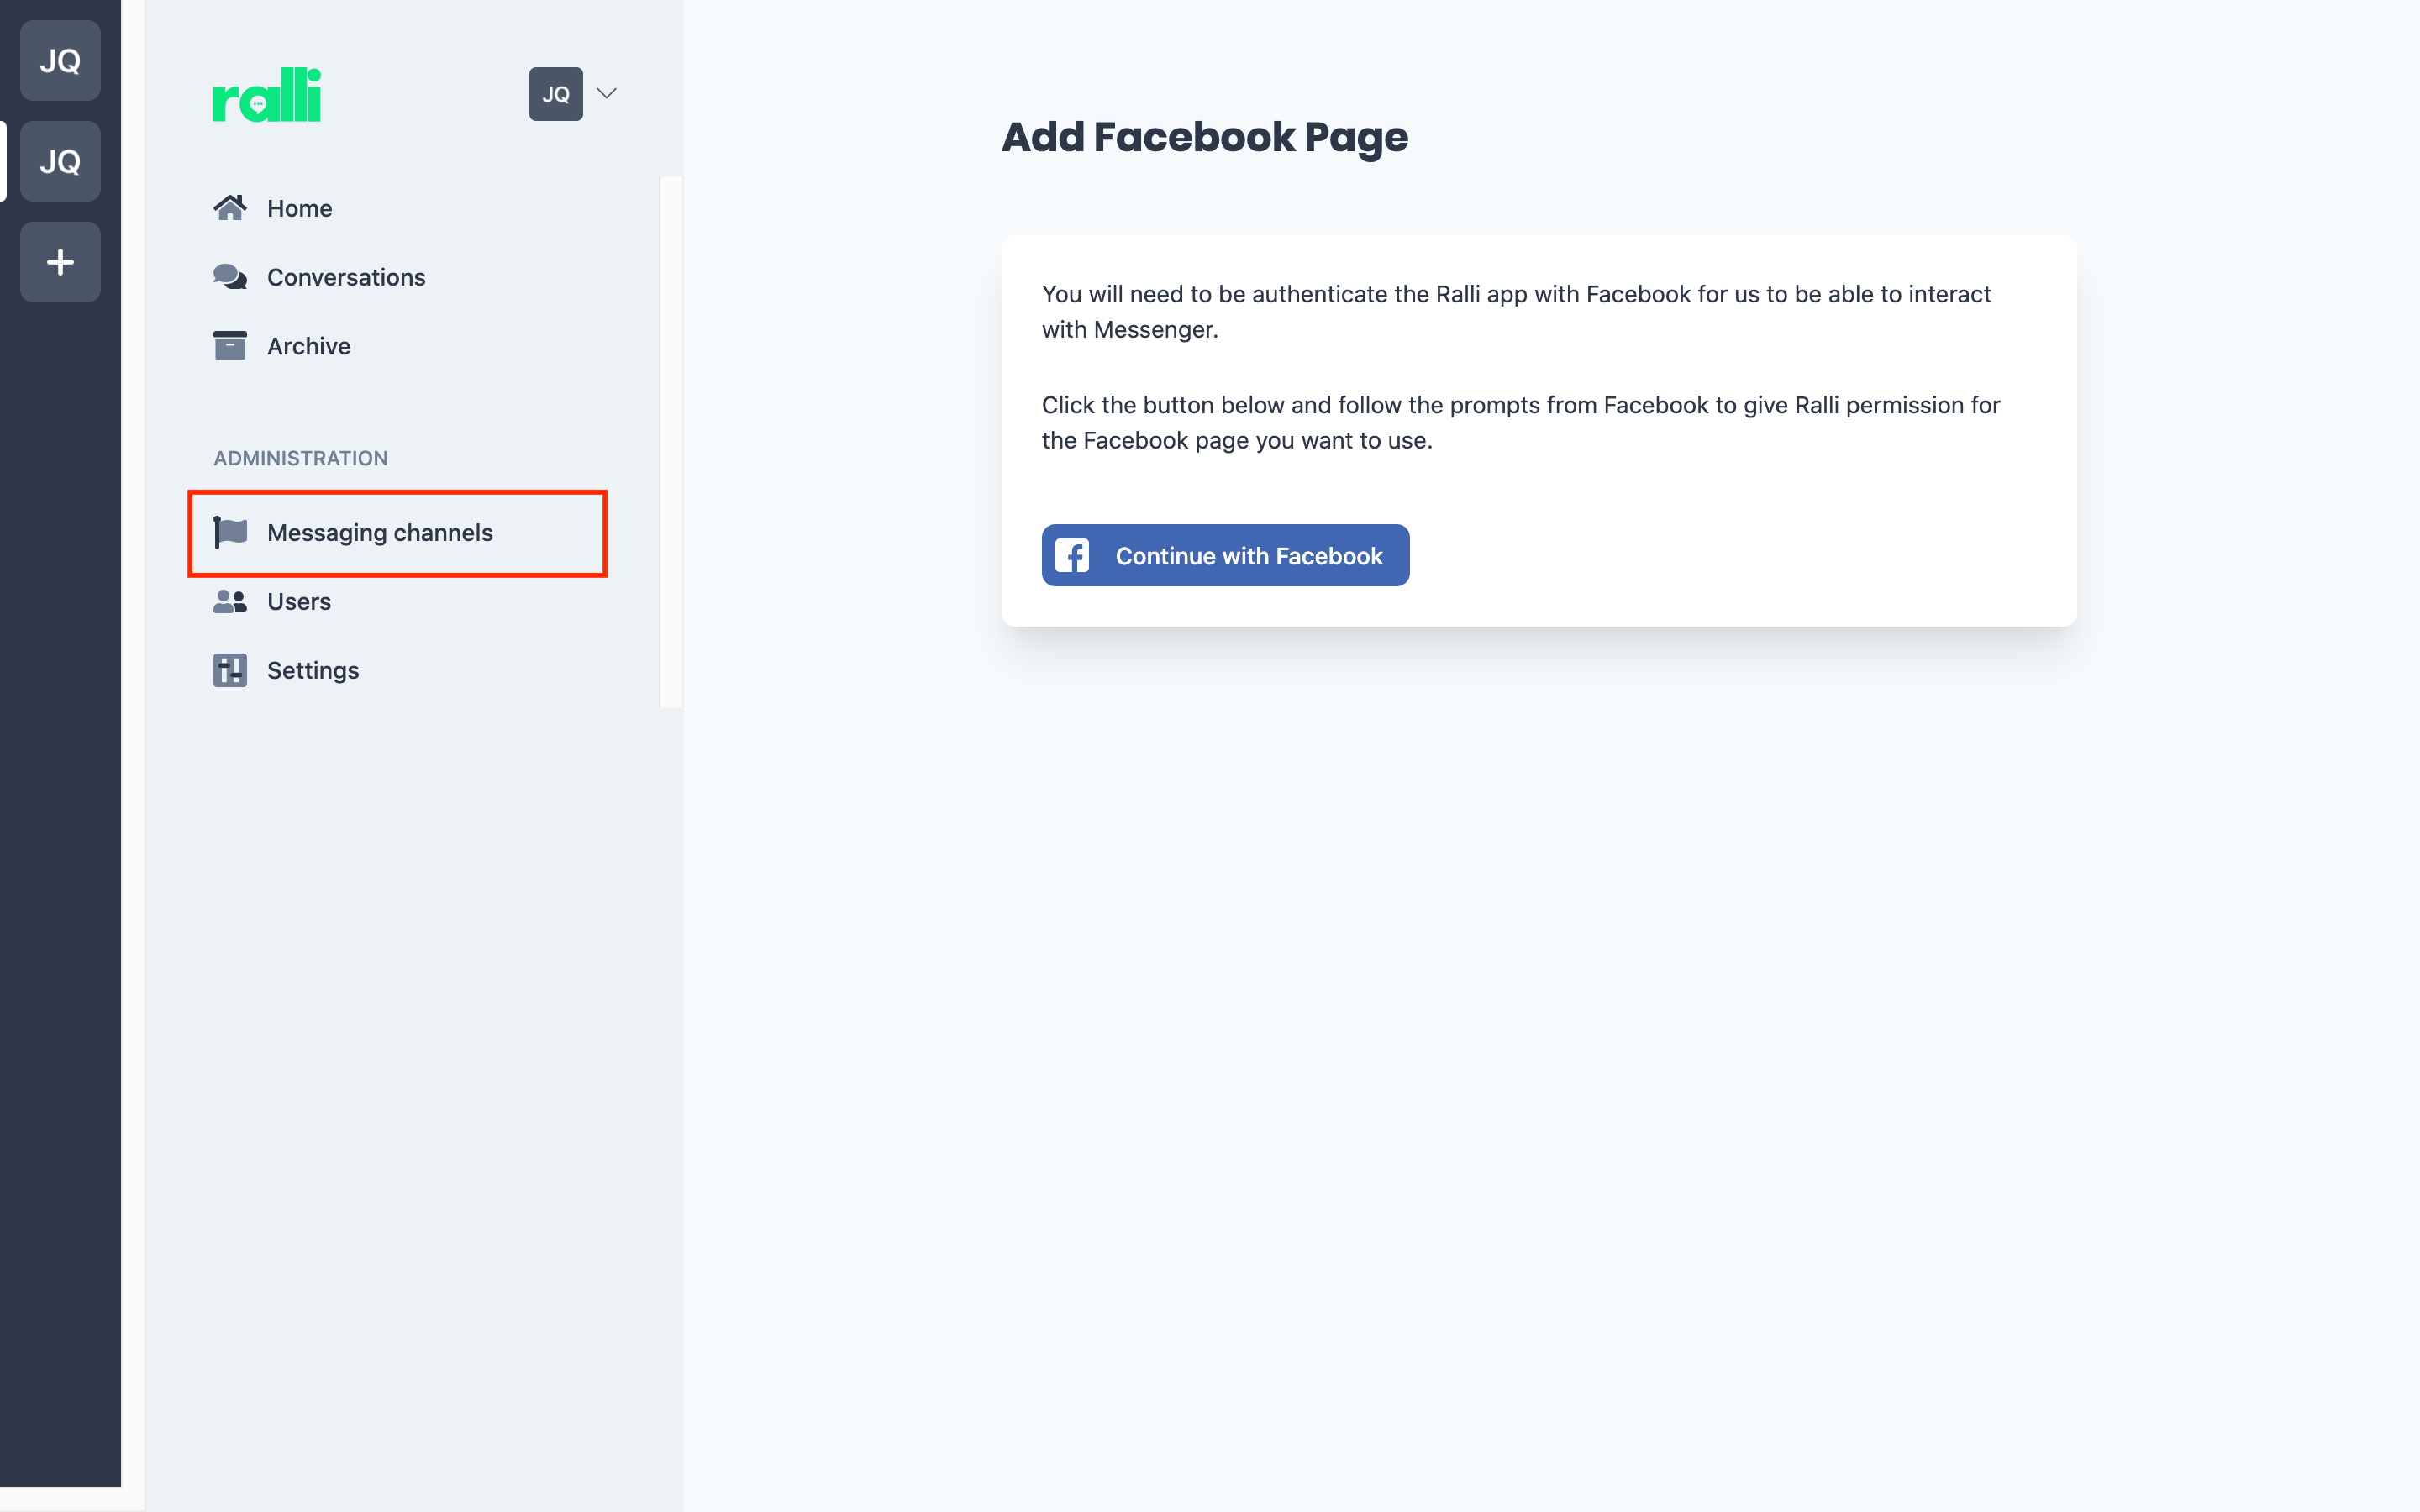
If you are running multiple different Facebook pages, but they are all managed by this one business, you can link Ralli with each of them.
Say, for example, you have a Facebook page for a store you run that sells birthday cakes, and a different page for a business you run selling sweets. It may make sense brand-wise to keep these as separate businesses from a Facebook community perspective, but it may just be easier to handle sales and support through Ralli for both of them in the one place with the same sales and support teams across both. In this case, it'd make sense to link both Facebook pages with this one Ralli account.
Otherwise, the simplest route for most businesses is that they are only going to have one Facebook page for their business, and we'll just link Ralli with that page.
Authenticate with Facebook
Before proceeding, please make sure you are logged in to your Facebook account that is an admin of the page you want to link. Then, proceed to click the Continue with Facebook button to walk through the process of linking your accounts together.
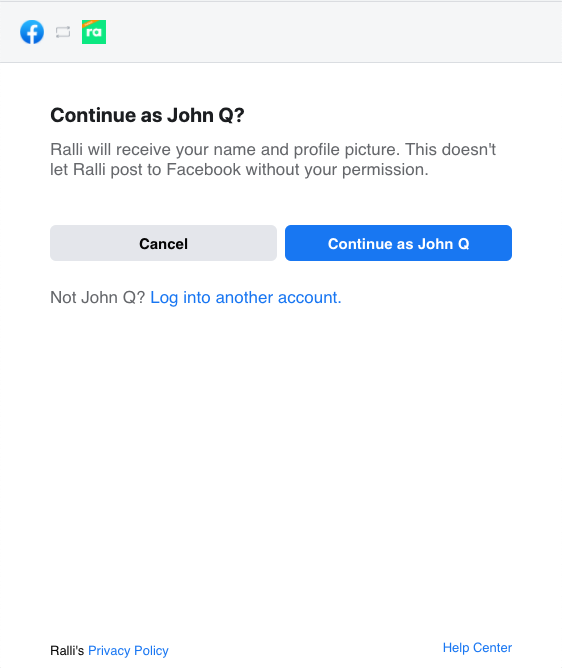
This step will allow us to read the pages that you are a member of on Facebook - and that's it. We won't post messages on your behalf, or post on your wall, or do any of that nasty stuff.
Select Your Business Pages
Select the page(s) you want to work with on Ralli. As discussed above, if you have multiple pages you want to manage on this one Ralli account, you can do so here. Most businesses will only have/need one page though, so select what works for you and your business needs (we don't charge more per link, so do as many as you want!).
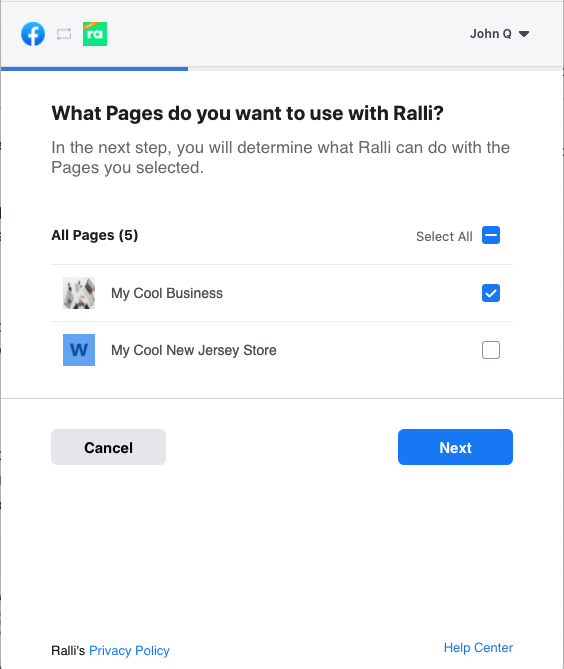
In the next step, we will require you to grant us permissions to send messages on your behalf - please enable these!
Grant Ralli Permissions
Please leave these permissions turned on (Ralli simply won't work for the page if you disable them).
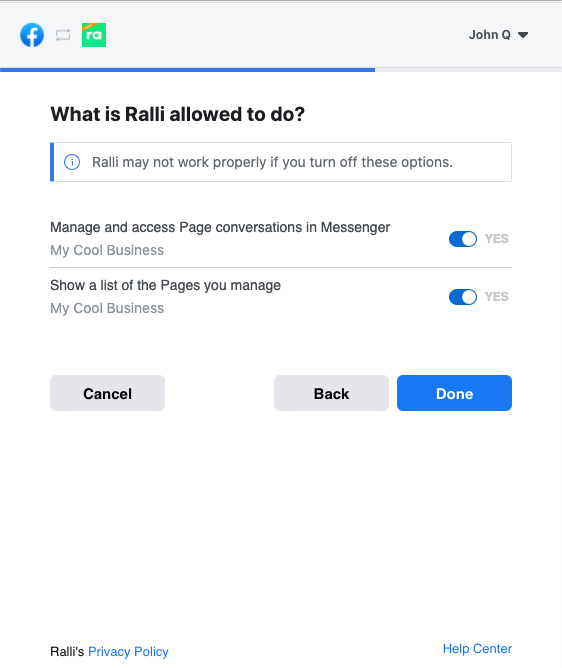
Please Note: This will allow Ralli to post messages to your customer's inboxes on your business' behalf - but that is the whole point. You and your staff will use the Ralli apps and website to handle messages, and our systems will make sure that your customers are talking to the right people in your business.
We will never post to your business' wall, or do anything else nefarious with this access - they remain your customers, privately, at all times.
Finishing Setup Back in Ralli
Ok, so now that we have authenticated with Facebook, we need to finish the process back on Ralli so that messages are flowing properly.
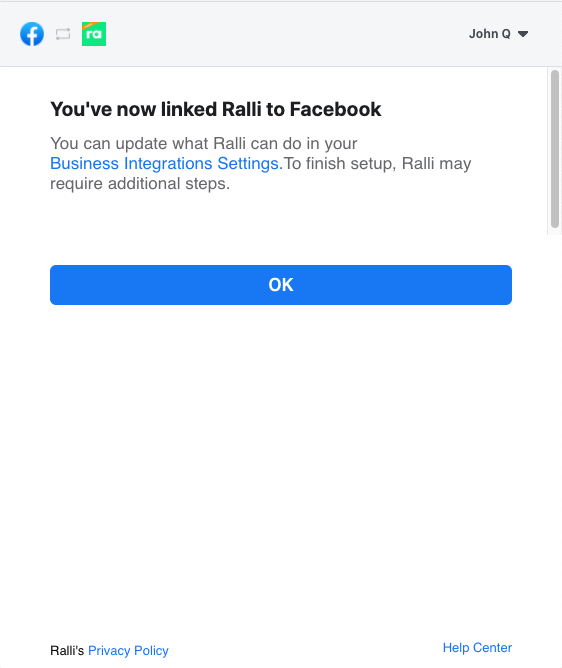
Dismiss the success Facebook dialog by clicking on OK. This should redirect you back to the Facebook page add screen within Ralli, if not, you can access that again here:
Finish the setup on Ralli
Opens in a new tab
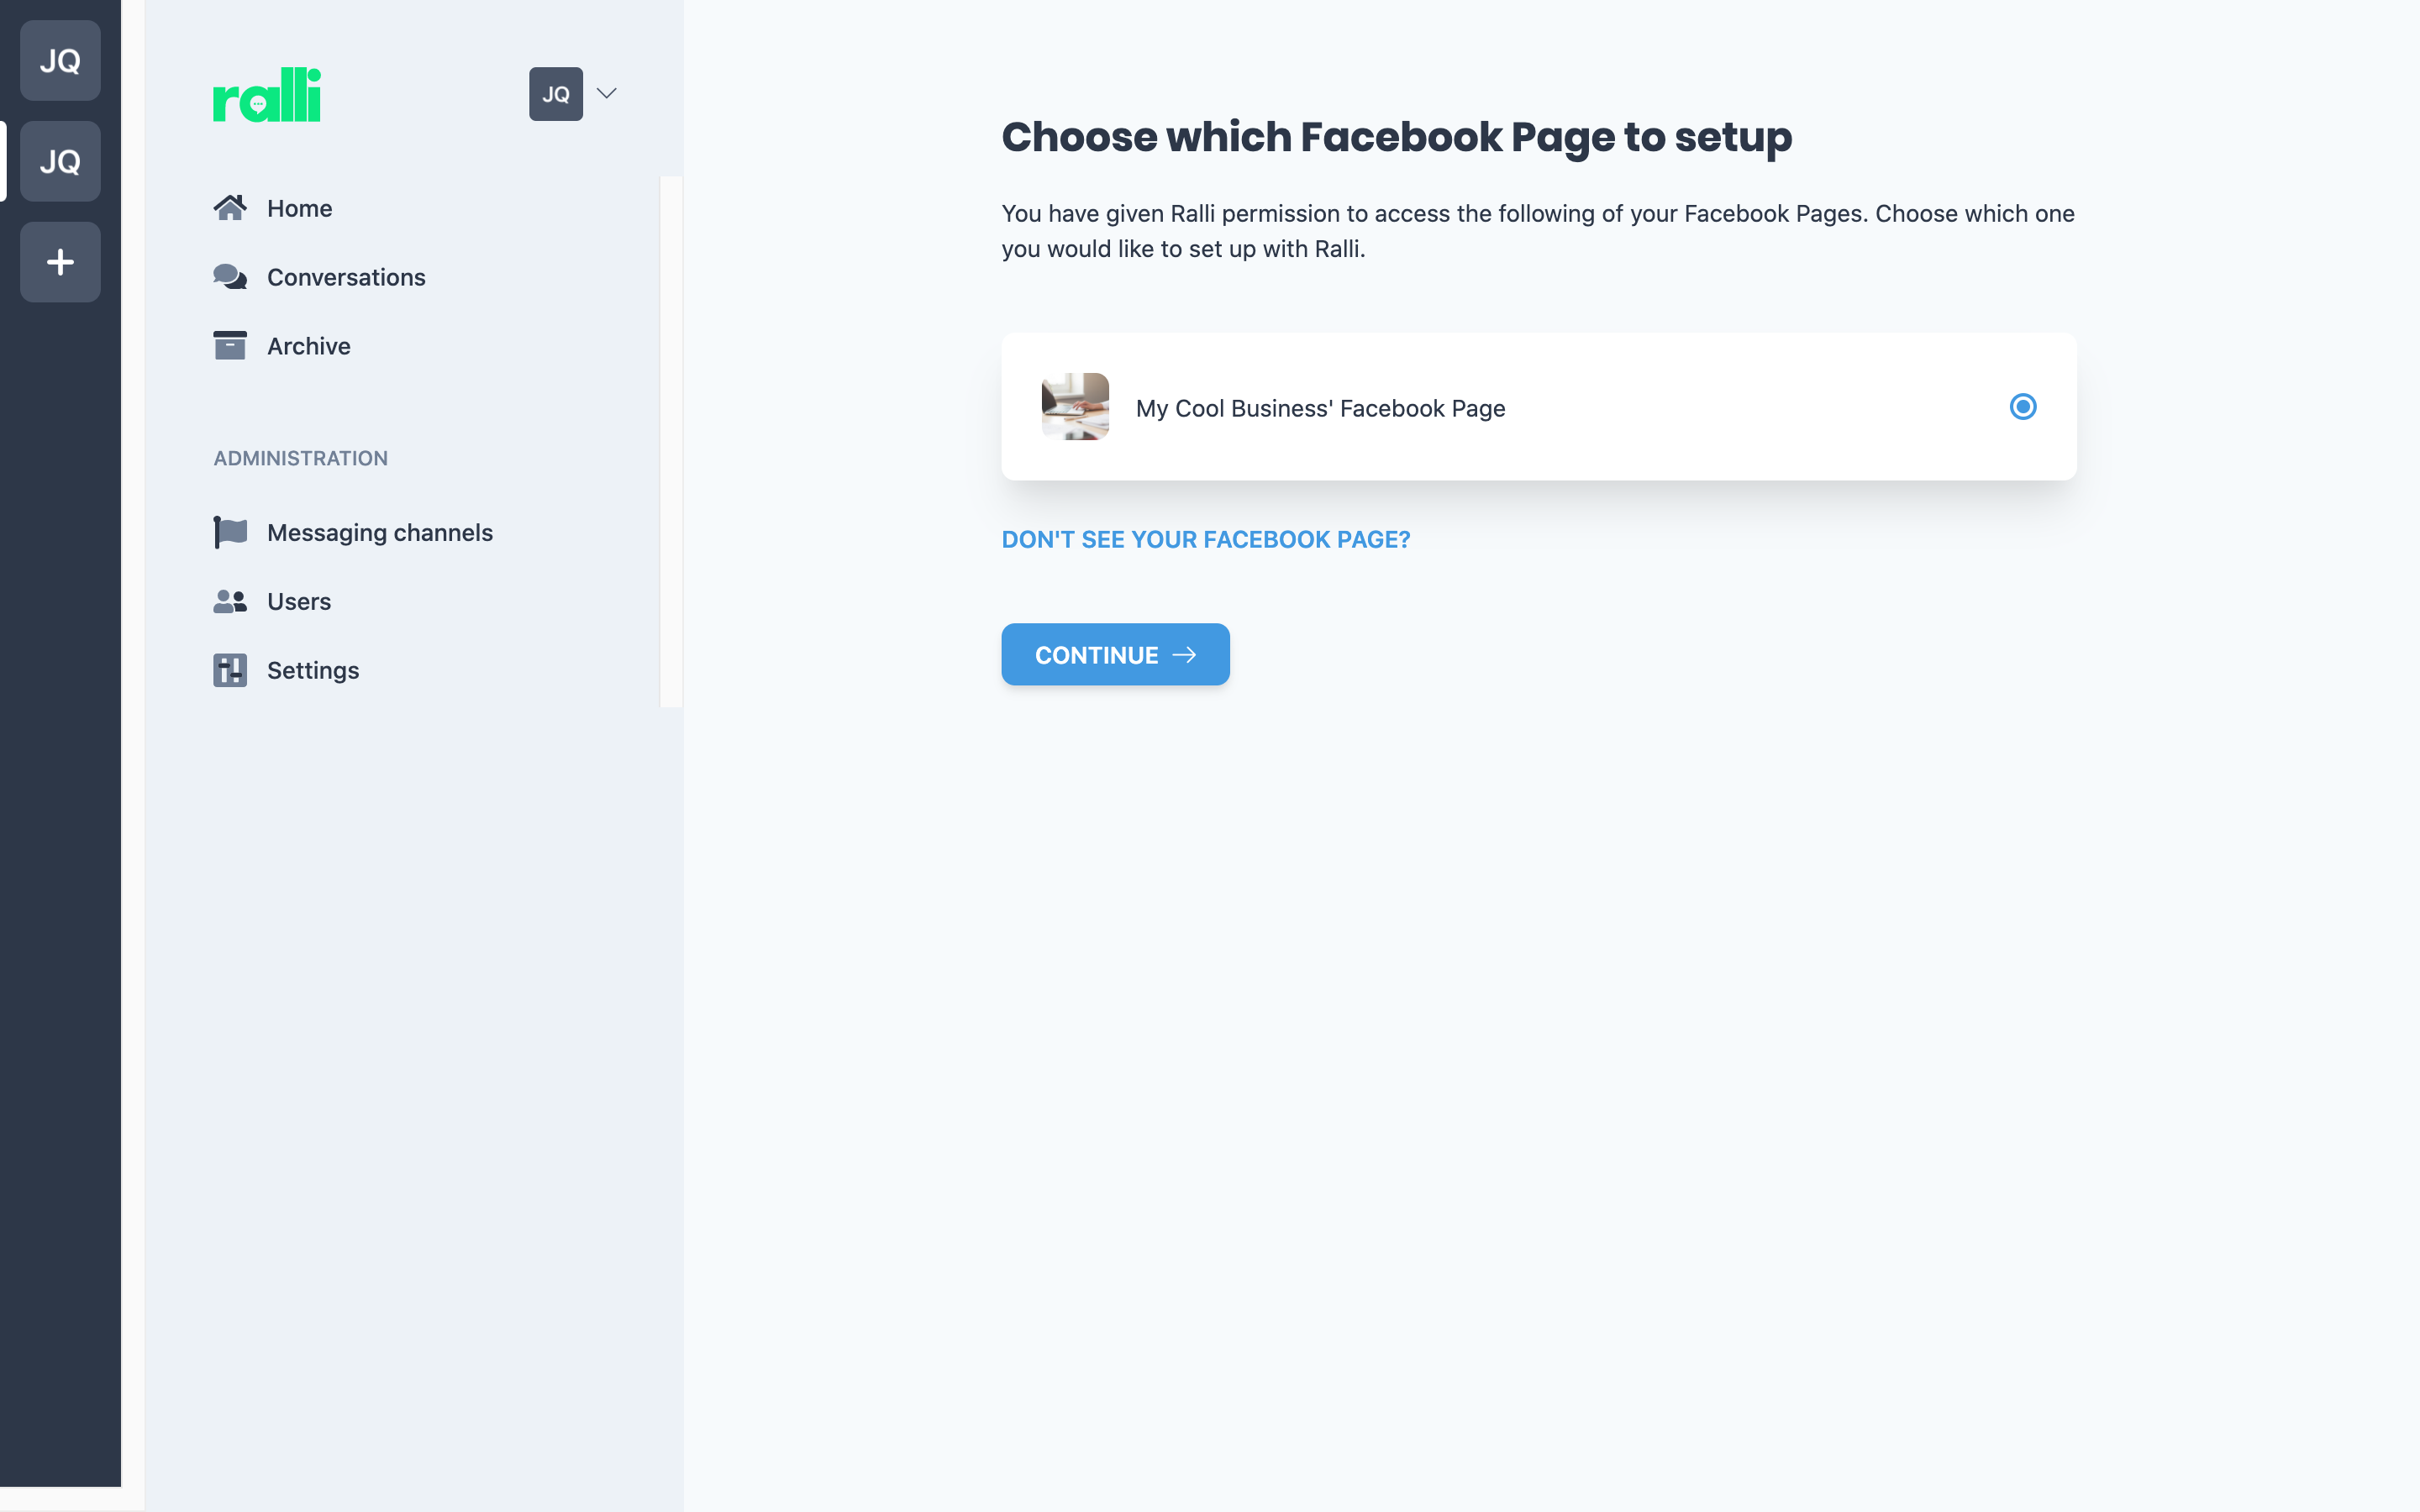
Select the page you want to finalise. If you have multiple Facebook pages you want to integrate with, you will need to repeat this step for each page (sorry luckily it's just one button click!).
Success
Great! That's it, your business' Facebook Messenger conversations will now flow between the Ralli apps and website, and with your customers on Messenger.
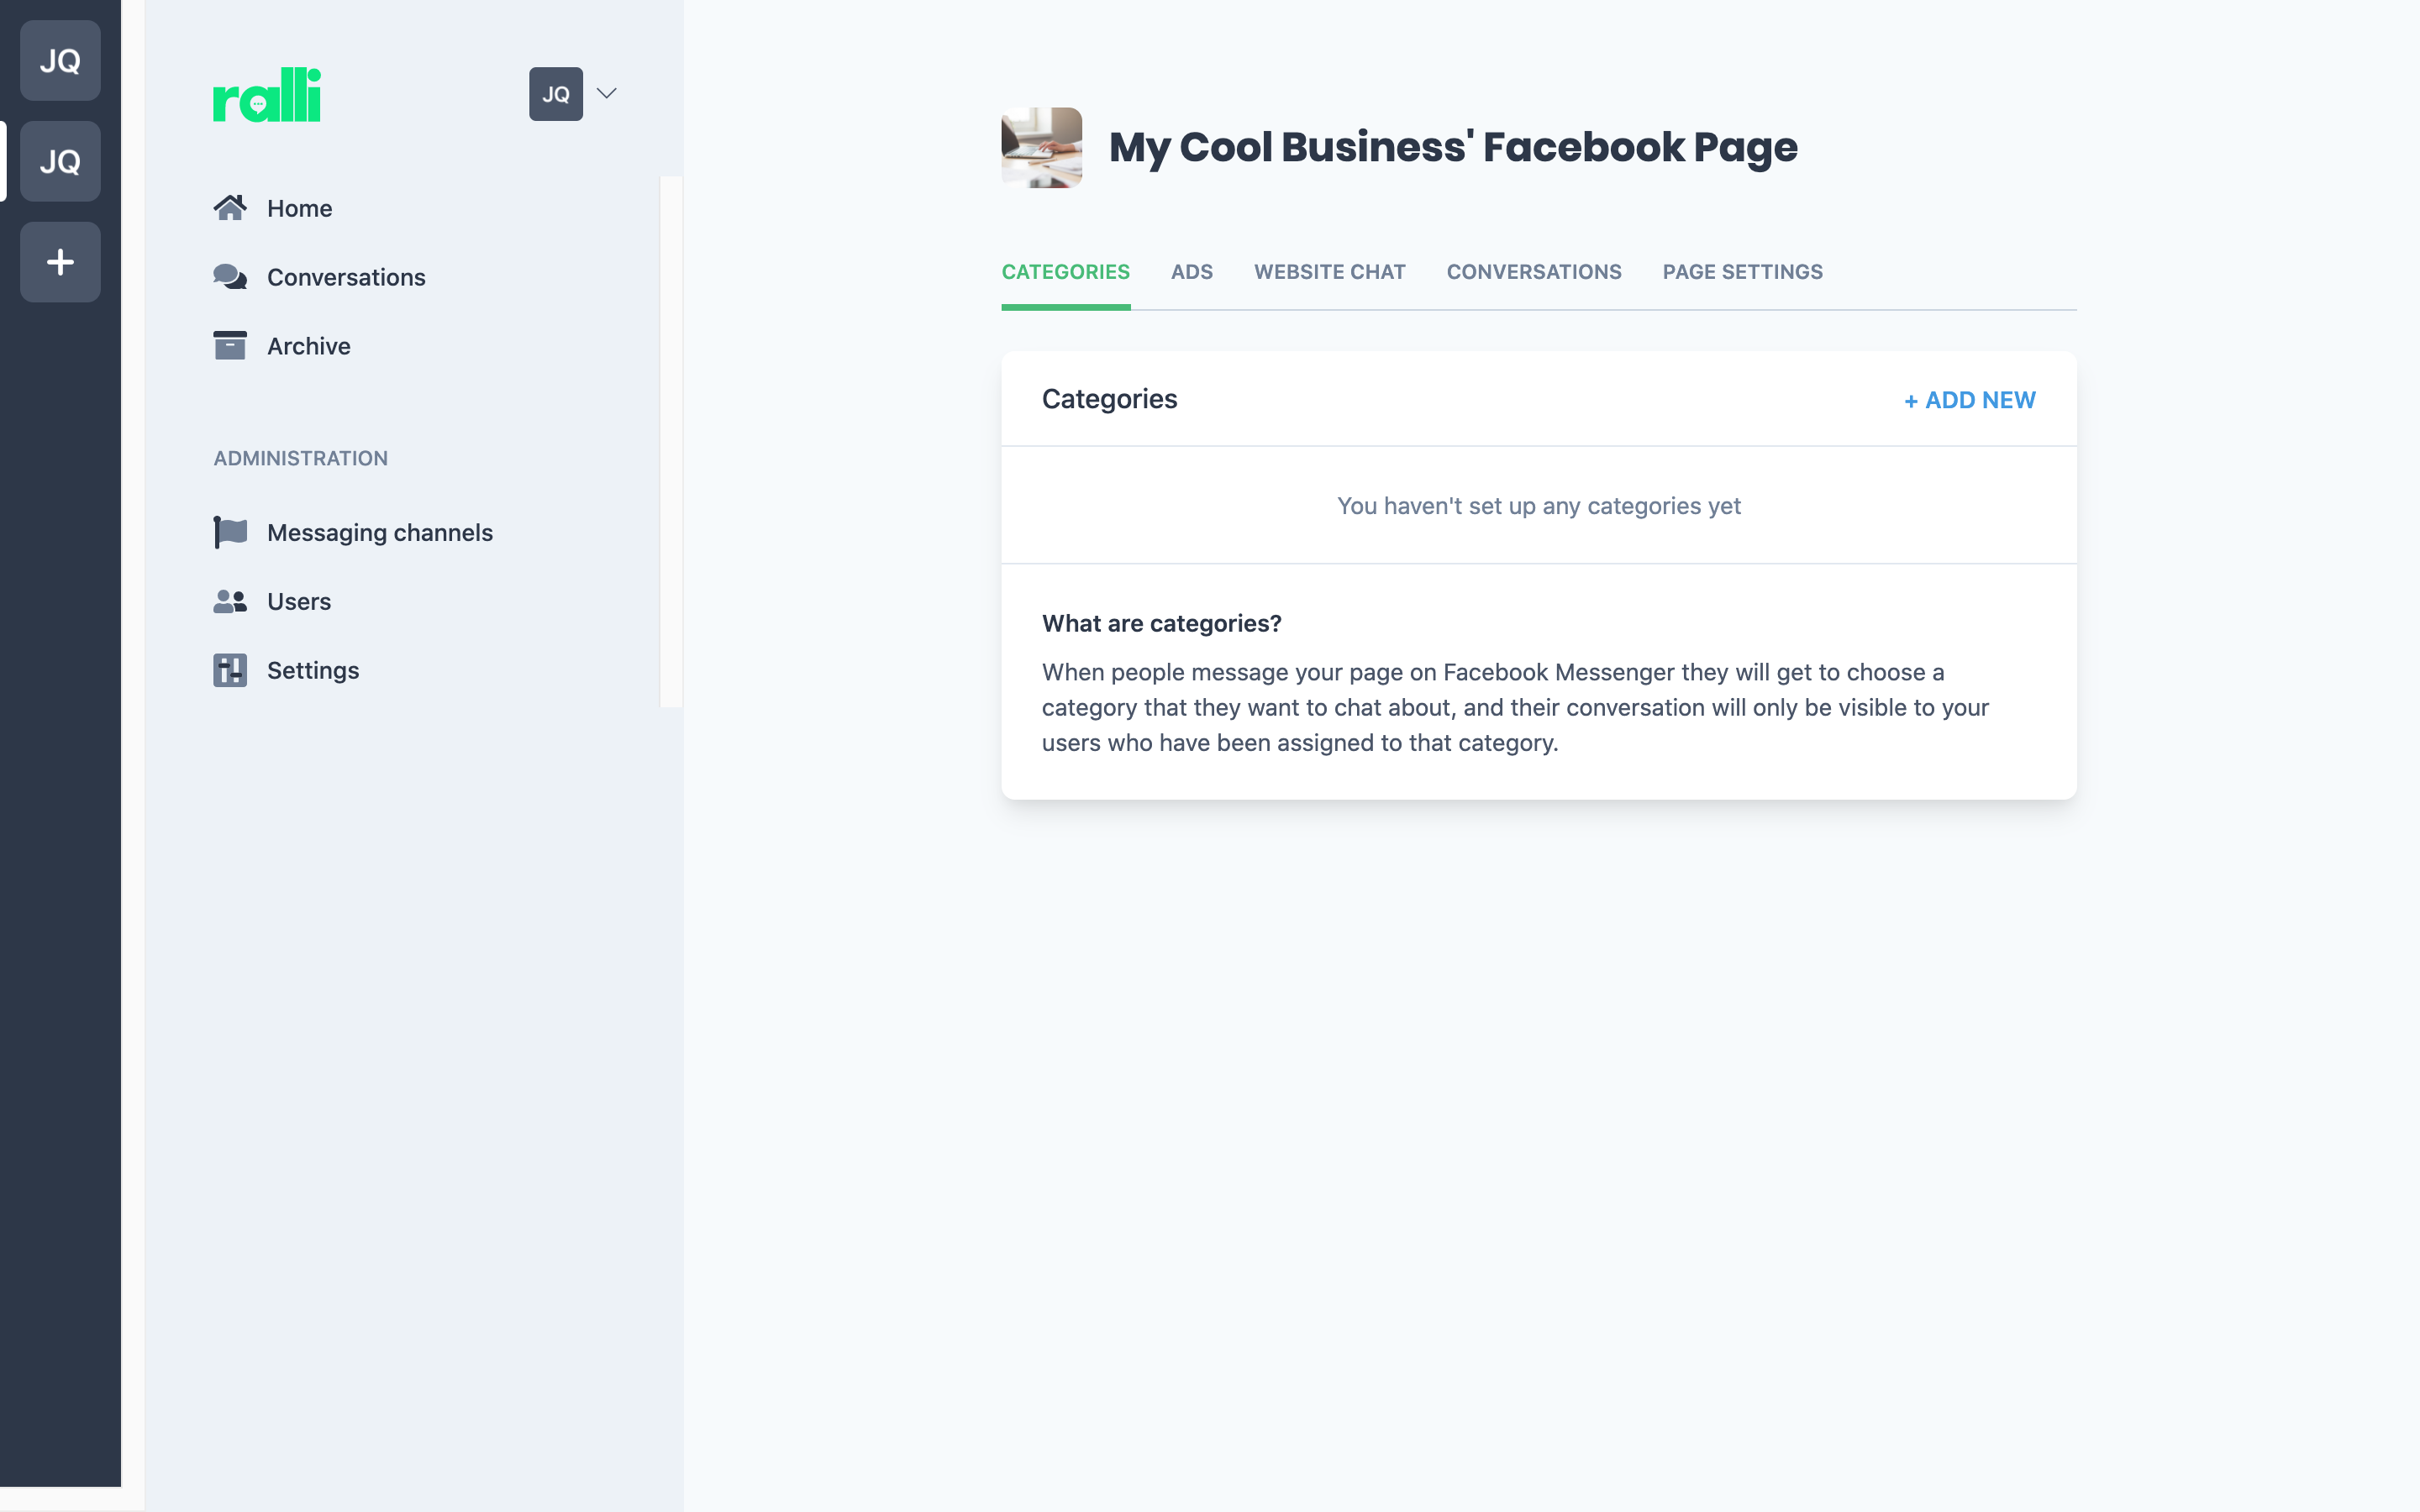
You can now manage this integration by adding categories, linking any advertisements your run through Facebook for deep analytics and advanced advertising effectiveness, and create your own Facebook plugin for your website.
You can return to the Messaging Channels management screen at any point by clicking here
Messaging Channels
Opens in a new tab
Next steps
Some next steps to maximise your experience with Ralli and Facebook:
- Add the Ralli chat plugin to your website to have visitors talk to you on your website via Facebook or anonymously.
or
- Add the Facebook branded chat plugin to your website to have visitors talk to you on your website via Facebook only.
and then
- Link your Facebook ads to your categories so you maximise your advertising spend.